How to Reverse a Video in CapCut: Easy Guide for Mobile & PC 2026
Introduction
I have come across a video where water jumps back, inside a glass someone seems to walk or an object suddenly returns to their hand. These video effects look unique and creative. They are often made by simply reversing a normal video clip.
You can easily learn how to reverse a video in CapCut. Even if you have never edited videos before CapCut includes a Reverse tool that plays your selected video from the end, to the beginning. There is no need to manually rearrange hundreds of frames to achieve this effect with CapCut.
I like to reverse clips for TikTok, Instagram Reels, YouTube Shorts, funny videos, transitions and creative edits. You can do this on both desktop versions and it is really fun. Sometimes buttons are in places but you can figure it out. If you want advanced features you can check out CapCut Pro on our homepage.
You will learn the steps to reverse videos on Android, iPhone, PC and Mac in this guide. We will cover audio, slow motion, video quality problems when you reverse videos and easy ways to make the final video look better.
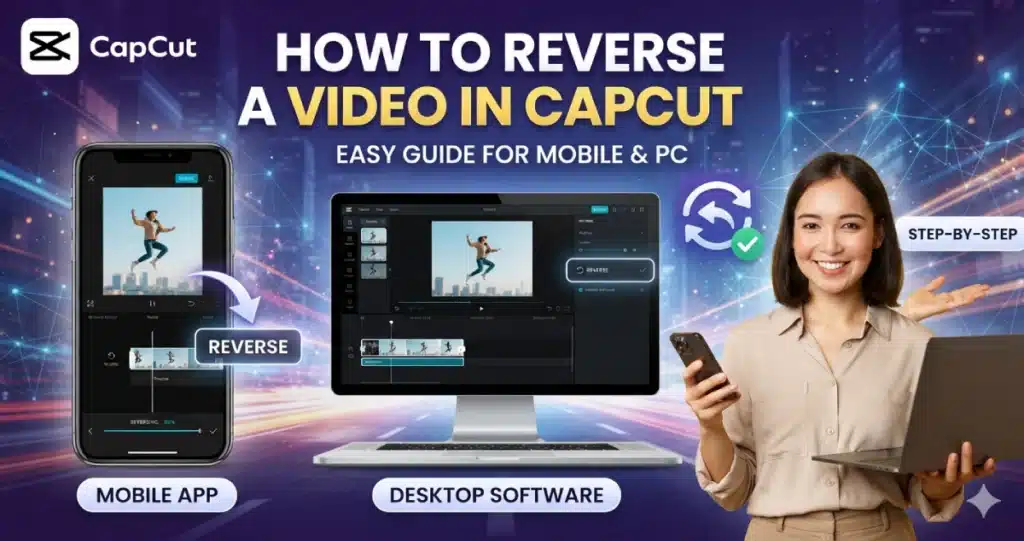
What Does Reverse Video Mean in CapCut?
Reversing a video means making the clip play backward.
Imagine recording yourself dropping a ball onto the floor. Normally, the ball leaves your hand and falls. After reversing the clip, the ball appears to move from the floor back into your hand.
CapCut handles this automatically. So you pick your selected video then you tap the Reverse option. Then you just have to wait for the app to finish up and process the video clip.
This effect can make simple footage much more interesting.
| Normal Video | Reversed Video |
| Water pours into a cup | Water moves back into the bottle |
| Person jumps into a pool | Person appears to jump out |
| Paper is torn apart | Paper appears to repair itself |
| Object falls | Object moves upward |
| Person walks forward | Person walks backward |
| Food is cut | Pieces appear to join together |
The effect works best when you plan the movement before recording.
Why Reverse a Video in CapCut?
Reverse editing is mainly a creative effect. You can take an ordinary action and make it look unusual without using complicated visual effects.
It works especially well for short form content because viewers may not immediately understand what they are seeing. That can make the first few seconds more interesting.
Creators use reverse videos for:
- TikTok edits
- Instagram Reels
- YouTube Shorts
- Funny clips
- Product videos
- Before and after effects
- Creative transitions
- Music edits
- Sports clips
- Travel videos
You can also combine reverse playback with effects, text, speed changes, overlays, and music.
The key is choosing the right footage. Reversing someone sitting still will not look very different. Reversing a clear movement can completely change the clip.
How to Reverse a Video in CapCut on Android?
You can turn a video clip around directly from the editing part, on Android.
The exact location of the Reverse button may change slightly between versions, but the process is simple. If you edit videos on your phone every day our CapCut for Android page is a place to go because it gives you a closer look at the CapCut for Android version.
Steps to Reverse a Video on Android
- Open CapCut on your Android phone.
- Tap New Project.
- Choose the video you want to reverse.
- Tap Add to place the video on the timeline.
- Select the video clip in the timeline.
- Swipe through the editing options at the bottom.
- Find and tap Reverse.
- Wait for CapCut to process the video.
- Play the clip to check the reversed result.
- Make any additional edits you need.
- Tap the Export button when you are finished.
Large video files and high resolution videos take time to be processed. You should keep CapCut open while CapCut is reversing the video clip.
Once processing finishes, watch the complete video. Some movements look much better backward than others.
How to Reverse a Video in CapCut on iPhone?
The reverse process on the iPhone is similar to Android.
You import your video, select the clip, and use the Reverse option from the editing toolbar. People who mainly edit on Apple phones or tablets can also check our CapCut for iOS guide for more information about using CapCut on these devices.
Steps to Reverse Video on iPhone
- Open CapCut.
- Tap New Project.
- Select your video from Photos.
- Add it to the editing timeline.
- Tap the video clip.
- Move through the editing tools until you see Reverse.
- Tap Reverse.
- Wait while CapCut processes the video.
- Preview the reversed clip.
- Add effects, music, text, or transitions if needed.
- Export the finished video.
4K videos that are long take more time to process than 4K videos that are short. This is how it is with 4K videos.
If you plan to reverse just a small part of a longer video, do not process the entire file. Split the part you want first. This saves processing time and makes the edit easier to control.
How to Reverse Only Part of a Video in CapCut?
You do not have to reverse the entire video.
If you need a video to play normally then have a part and then play normally again at the end this method is good to use.
Reverse One Section of a Video
- Import your complete video.
- Move the playhead to where the reverse effect should begin.
- Tap Split.
- Move to where the reverse effect should end.
- Split the clip again.
- Select the middle section.
- Tap Reverse.
- Wait for processing to finish.
- Preview the complete sequence.
Now only the selected part will play backward.
I think this method is really good for transitions and short creative moments because people can see movement and reversed movement in the same edit. This method is about showing transitions and short creative moments in a new way.
How to Reverse a Video in CapCut on PC?
When you edit on a desktop you get space on the timeline. This makes it easier to edit videos that’re really long.
When I edit YouTube videos or bigger projects I think CapCut for PC is more comfortable to use than a phone screen because it is just easier to see what I am doing.
Steps to Reverse Video on PC
- Launch CapCut on your computer.
- Create a new project.
- Import the video file.
- Drag your video onto the timeline.
- Select the clip.
- Find the Reverse option in the available editing controls.
- Click Reverse.
- Wait while CapCut processes the video.
- Play the reversed clip in the preview window.
- Make additional changes if required.
- Export your finished video.
A desktop computer can handle clips more easily but the time it takes to process them still depends on the length of your video, the resolution, the codec and how well your desktop computer performs.
For example, a short 1080p clip may reverse quickly. A long 4K video can take considerably longer.
How to Reverse a Video in CapCut on Mac?
CapCut can also reverse videos on macOS.
The basic workflow is almost the same as on Windows. If Mac is your main editing device, our CapCut for Mac page provides more information about the desktop version.
Reverse a Video on Mac
- Open CapCut on your Mac.
- Start a new project.
- Import your video.
- Place it on the timeline.
- Select the video clip.
- Choose the Reverse option.
- Allow CapCut to process the clip.
- Preview the result.
- Add other edits if needed.
- Export your final video.
One advantage of desktop editing is the larger preview. It is easier to see whether your reversed movement looks smooth before exporting.
How Long Does CapCut Take to Reverse a Video?
There is no single processing time for every video.
A short clip can finish quickly, while a longer or higher quality video may take more time.
Several things affect reverse processing:
| Factor | Effect on Processing |
| Video length | Longer videos take more time |
| Resolution | 4K can take longer than 1080p |
| Device performance | Faster devices usually process sooner |
| Available storage | Low storage may cause problems |
| Background apps | Heavy apps can reduce performance |
| Video format | Some files are harder to process |
If you are making a reverse effect for a Reel or Short, trimming the footage before reversing it can save time.
There is little reason to process a five minute video if you only need a three second reverse effect.
Does CapCut Reverse Audio Too?
Audio is an important part of reverse editing.
When a video is played in reverse the normal speech and music in the video may not match the movement in the video. Even if the audio in the video changes based on your workflow the reversed speech in the video often sounds unnatural. Is not very useful for normal video content.
I like making videos. When I do, I. Remove the original audio from the creative videos. After that I add music or sound effects to the videos.
You can:
- Mute the original audio
- Add background music
- Add sound effects
- Record a voice over
- Extract audio separately
- Sync a new beat to the reversed action
If the sound moves out of position after editing, your published guide on how to sync audio in CapCut can help readers correct timing problems.
Can You Reverse Audio Separately in CapCut?
Video reverse and audio editing are not always the same thing.
If you want a special backward sound effect, you may need to work with the audio separately depending on the tools available in your current version.
For most normal edits, there is an easier solution. Mute the original clip and add fresh audio over the reversed footage.
This gives you much more control.
For example, if a bottle appears to jump from the floor into your hand, adding a short whoosh sound can make the movement feel much stronger than keeping the original recording.
How to Make a Reverse Video Look Smooth?
Pressing Reverse is easy. Making the result look intentional takes a little more thought.
The best reverse effects usually begin during recording.
Record Clear Movement
Choose an action with an obvious beginning and end.
Things like throwing and dropping and pouring and jumping and opening and breaking and moving objects can make footage that is really creative.
Keep the Camera Stable
Camera shake also plays backward.
If the camera moves too much, the reversed clip may feel messy. A tripod or stable phone position can make the final result cleaner.
Leave Space Before and After the Action
Do not stop recording immediately after the movement ends.
Record an extra second before and after the main action. You can trim these parts later.
This gives you more freedom when choosing where the reversed clip starts and stops.
Use Good Lighting
Clear footage is easier to edit and looks better after processing.
Good lighting also helps if you later add effects, background removal, masks, or overlays.
How to Combine Reverse and Slow Motion in CapCut?
This is one of my favorite ways to make a basic reverse clip more interesting.
Instead of playing the reversed action at normal speed, slow down the most important moment.
Record yourself throwing sunglasses into the air. Then reverse the video so the sunglasses look like they fly into your hand then slow down the part for a better result with the sunglasses.
Basic Workflow
- Import your clip.
- Trim the part you need.
- Reverse the clip.
- Select the reversed video.
- Open the speed controls.
- Reduce the speed.
- Preview the movement.
- Adjust until it looks smooth.
- Add music or sound effects.
You already have a full article about creating a slow motion effect on CapCut, so readers who want more control over speed can continue with that guide.
How to Make a Reverse Loop in CapCut?
A reverse loop plays an action forward and then immediately backward.
This can make a short movement repeat smoothly.
Suppose you record a person jumping. The first clip shows the normal jump. The duplicate is reversed, making the person return to the starting position.
Create a Simple Reverse Loop
- Add your original video.
- Trim it to the exact action.
- Duplicate the clip.
- Keep the first copy normal.
- Reverse the second copy.
- Place the reversed copy directly after the original.
- Preview the transition between them.
- Trim any repeated frames if the movement pauses.
- Add music if needed.
The result plays forward and then backward.
This effect works particularly well with waves, jumping, dancing, pouring liquids, opening objects, and hand movements.
How to Use Reverse Video for Creative Transitions?
A reverse clip can also become a transition between two scenes.
For example, you can cover the camera with your hand at the end of one clip. Record another scene starting with your hand over the camera. With careful trimming and reverse effects, the movement can connect the scenes.
You can combine reverse with:
- Zoom effects
- Motion blur
- Overlays
- Keyframes
- Flash transitions
- Speed changes
Your existing guide about using overlays in CapCut is useful if you want to add another visual layer to these transitions.
The important part is timing. A simple effect with good timing usually looks better than five effects placed on top of each other.
Can You Reverse a Video Using CapCut APK?
Yes, when the installed Android version includes the Reverse tool.
If you use CapCut APK Download, the exact location and availability of editing features may depend on the version installed on your phone.
This is another reason to avoid following an old tutorial exactly. CapCut changes its interface over time. A tutorial may show Reverse in one position while your current version places it somewhere else.
Select your video first and check the editing toolbar. If Reverse is not immediately visible, swipe through the available tools.
Why Is CapCut Reverse Not Working?
Sometimes you tap Reverse and nothing happens. The processing bar may stop, the app may freeze, or CapCut may close.
This does not always mean the Reverse feature is broken.
Common causes include:
- Low device storage
- Low RAM
- Very large video file
- Unsupported or damaged video
- Outdated CapCut version
- Too many background apps
- Temporary app cache problem
- Device overheating
Try the basic fixes before starting the project again.
How to Fix CapCut Reverse Stuck or Not Processing?
If Reverse gets stuck, try these steps.
1. Trim the Video
Long clips require more processing.
You need to trim the video to the section you want to reverse. This is the step.
2. Close Background Apps
Other apps can use memory that CapCut needs for processing.
Close games, browsers, social media apps, and other editors.
3. Check Storage
CapCut needs free storage for temporary editing files.
If your device is almost full you should get rid of files you do not need or move videos to another location. This will help your device have space.
4. Restart CapCut
Close the application completely and open it again.
Then retry the reverse process.
5. Restart Your Device
A restart can clear temporary memory problems.
6. Update CapCut
Older versions may contain bugs that have already been fixed.
If the entire app is causing problems rather than just the Reverse tool, our published CapCut not working guide can help you solve wider issues.
Why Does CapCut Crash While Reversing a Video?
Usually reversing a video needs more power than just trimming a clip or adding some text to it.
4K videos can be slow on older phones especially if I have multiple apps open on the older phones.
First try reversing a video. If a ten second video works as expected but your five minute video crashes the problem is likely due to the processing load of the video of the Reverse button.
Your existing CapCut app crashing article can provide more detailed fixes if crashes happen throughout the app.
Why Is My Reversed Video Laggy?
A reversed clip may sometimes look less smooth during preview.
Do not judge your video based on the preview alone. The preview is often shown in a quality so that the timeline responds faster.
However, lag can also come from:
- High resolution footage
- Low RAM
- Heavy effects
- Multiple video layers
- Low storage
- High frame rate footage
Try removing unnecessary effects and preview the clip again.
If the entire timeline is slow, your CapCut lag fix guide is a natural next resource.
Does Reversing a Video Reduce Quality?
Reversing itself changes the playback direction. It does not mean you should intentionally lower the resolution.
Quality loss is more likely to happen during repeated exports or when you choose low export settings.
Try to keep the final export close to the quality of your original video.
For example:
- 1080p source → export at 1080p when suitable
- 30 FPS source → 30 FPS is usually enough
- 60 FPS source → keep 60 FPS if smooth motion matters
If you are unsure which options to choose, your published guide to the best CapCut export settings can help readers protect video quality.
Best Videos to Reverse in CapCut
Not every clip becomes interesting when reversed.
The effect works best when the action clearly changes position or shape.
Good ideas include:
- Jumping into water
- Pouring a drink
- Dropping an object
- Throwing something
- Breaking paper
- Spreading cards
- Opening a package
- Throwing clothes
- Blowing confetti
- Moving food
- Sports tricks
- Hair flips
A simple action can look surprisingly creative backward.
Try thinking about the reversed result before you record. Ask yourself: What would this movement look like if it happened in the opposite direction?
That one question can give you plenty of ideas.
Reverse Video Ideas for TikTok and Reels
Short videos are ideal for reverse effects because the action happens quickly.
You could record yourself dropping clothes onto a bed and reverse the video so everything appears to jump into your hands.
Another idea is pouring colorful objects onto a table and reversing them back into a container.
For beauty content, you can record removing an accessory and reverse the clip so it appears instantly.
Keep these clips short. The viewer should understand the effect without waiting too long.
Music also matters. Try placing the main reversed action on a beat or sound change.
Reverse Video Ideas for YouTube Shorts
YouTube Shorts give you similar creative options.
You can make:
- Mini magic tricks
- Reverse cooking clips
- Sports edits
- Travel transitions
- Product reveals
- Funny experiments
- Before and after sequences
The reverse effect should support the idea rather than becoming the whole video.
A short introduction followed by an unexpected backward movement can work better than reversing every second of the Short.
Reverse Video vs Normal Speed Editing
Reverse and speed controls do different jobs.
| Tool | Purpose |
| Reverse | Plays footage backward |
| Slow Motion | Makes footage play slower |
| Speed Up | Makes footage play faster |
| Freeze Frame | Holds one moment |
| Split | Separates parts of a clip |
| Keyframes | Changes properties over time |
You can combine these tools.
For example, reverse the clip first, slow down its final second, and use keyframes to add a small zoom.
If you want smoother movement during that zoom, your smooth keyframes in CapCut PC guide can help with the next step.
Common Mistakes When Reversing Videos
Reverse editing is simple, but a few mistakes can make the result feel awkward.
Reversing a clip that is too long: Short actions usually create stronger effects.
Keeping bad original audio: Backward speech can sound distracting.
Ignoring the start and end: Trim unnecessary frames before and after the main action.
Using too many effects: Let the reverse movement remain the main visual idea.
Exporting without previewing: Watch the complete video before saving it.
Using low quality footage: Start with the best source file available.
Forgetting storage: Reversing and exporting both require temporary space.
These are small things, but fixing them makes the final video feel much cleaner.
Pro Tips for Better Reverse Videos
Plan the effect before recording whenever possible.
Keep your phone stable and record the complete movement. Leave a little extra footage at both ends.
Use short clips. They process faster and are easier to control.
Remove awkward audio and replace it with music or a suitable sound effect.
Try combining reverse with slow motion, but do not make every clip slow.
Match the movement to your music.
Preview the final video at normal speed before exporting.
Most importantly, keep the effect easy to understand. The best reverse videos often use one simple action and execute it well.
Is CapCut Pro Required to Reverse a Video?
You do not need a premium subscription to do video editing. Basic video editing is free.. The features you get with basic video editing can be different, on different platforms app versions, regions and subscription plans.
Check the Reverse tool available in your current version first.
If you regularly use advanced effects, AI tools, premium templates, and other editing features, CapCut Premium may provide more value across your full workflow rather than for the Reverse feature alone.
Can Beginners Use the CapCut Reverse Tool?
Yes. Reverse is one of the easier creative tools to understand.
You do not need keyframes or advanced animation skills for a basic reverse video. Import the clip, select it, tap Reverse, and wait for processing.
The creative part comes afterward.
The clip is yours to control. You decide where it begins and where it ends. You can also decide if slow motion is an idea.. You pick the music that fits the clip.
Once you practice with one or two reverse edits, the process becomes simple.
Quick Checklist Before Exporting a Reverse Video
Before you save your project, check these points:
- Is the correct part of the clip reversed?
- Did you remove unnecessary frames?
- Does the movement look smooth?
- Is the original audio still needed?
- Does your music match the action?
- Are there unnecessary effects?
- Is the resolution correct?
- Is the frame rate suitable?
- Did you watch the full video once?
If everything looks good, export the video.
If CapCut Pro APK Download is part of your research project on CapCut our homepage can be really helpful. It provides information about the CapCut version, its features, the platforms you can choose from and some editing resources.
Final Thoughts
Learning to reverse a video in CapCut helps you transform footage into something more interesting. You can make objects appear to rise, make water return to a bottle, create magic effects or build smooth reverse loops.
Whether you use an Android, iPhone, PC or Mac, reversing a video is easy. You import the video, select the part you want, and apply the Reverse tool. Then you make it look better with some trimming, speed adjustments, music or effects.
Choose clips with clear motion to begin. These short clips process faster and generally provide results. After you master the Reverse tool you can experiment with the Reverse tool and slow motion overlays, keyframes and other CapCut features to make your videos more creative using the Reverse tool.
Frequently Asked Questions
How do I reverse a video in CapCut?
You import the video into CapCut. Then you move it to the timeline. You select the clip. Now you open the editing toolbar. Choose Reverse. You wait until it is done. When the video is reversed you preview the clip. You check if it is okay. If it is, you continue with music or effects or text or other things. Then you export the video.
Can I reverse only part of a video in CapCut?
Yes. When you want to reverse a part of your video you should cut the video at the beginning. End of that part. Then you select the clip you just separated and use the Reverse feature. The other parts of the video will keep playing as they normally do. The part you chose will play in reverse.
Can I reverse a video in CapCut for free?
You can usually do reverse editing in CapCut without paying for a subscription.. Capcut might update what features you can use depending on what version of CapCut you have, what device you are using, where you are and what kind of subscription you have. You should check what editing tools you have to make sure. You usually do not need to be good at editing to make a video that plays backwards.
Why is CapCut taking so long to reverse my video?
Long video clips, high-resolution 4K videos, memory, low storage space, background applications and slower hardware can all cause problems and increase the processing time in CapCut. You should trim the section of the video that you want to reverse. You should close any unnecessary apps and you should keep enough storage free on your device. If you have video clips then they will usually process much faster in CapCut.
Why is the Reverse option not working in CapCut?
The reverse feature in CapCut may not work because of storage or an outdated CapCut app or a corrupted video file or limited device memory or a temporary CapCut glitch. You should restart the app and your device and update CapCut. Then test a shorter clip. If it works then the original video may be too demanding.
Does reversing a video in CapCut reduce its quality?
The Reverse tool is really good at changing the way your video plays. It makes the video play backwards. If the video does not look as good as you thought it would it is probably because of the settings you used when you exported the video.. Maybe you compressed the video too many times. To get the video use a video that is already high quality and choose the right settings when you export it.
Can I reverse a CapCut video on PC?
Yes. Open CapCut for PC import your video. Place it on the timeline. Highlight the video clip. Use the Reverse tool. Wait for processing to finish then preview the reversed video. I find that the timeline and preview window on a desktop make long video editing much easier.
Can I reverse a video and add slow motion in CapCut?
Yes. First you need to reverse the selected clip. Then you can use the speed controls to slow it down. When you combine playback with slow motion it can make things like jumps and throws look really cool. It also works well for water effects and transitions. Just make sure to keep the clip short and check the preview to make sure everything looks smooth.