How to Do Picture in Picture on CapCut: Quick & Easy Guide 2026
Introduction
So picture in picture is really useful when you want to play two videos on the same screen. I have seen this a lot in reaction videos and gaming clips and tutorials and interviews and product reviews. The main video is big. Covers most of the screen.. Then there is a smaller video that is placed above the main video.
Making a picture in a picture on CapCut is really easy. You can add a video on your mobile phone, make it smaller or bigger and move it around on the screen. If you are using a computer you can do the thing by using many video tracks at the same time.
If you want a Picture in Picture effect or something more customized CapCut Pro APK gives you the tools to do it. You can use masks and animations and keyframes to make your videos more interesting. This guide will show you the Picture in Picture process on Android and iPhone and PC and Mac. It will also talk about some problems and give you some useful solutions to try.
What Is Picture in Picture in CapCut?
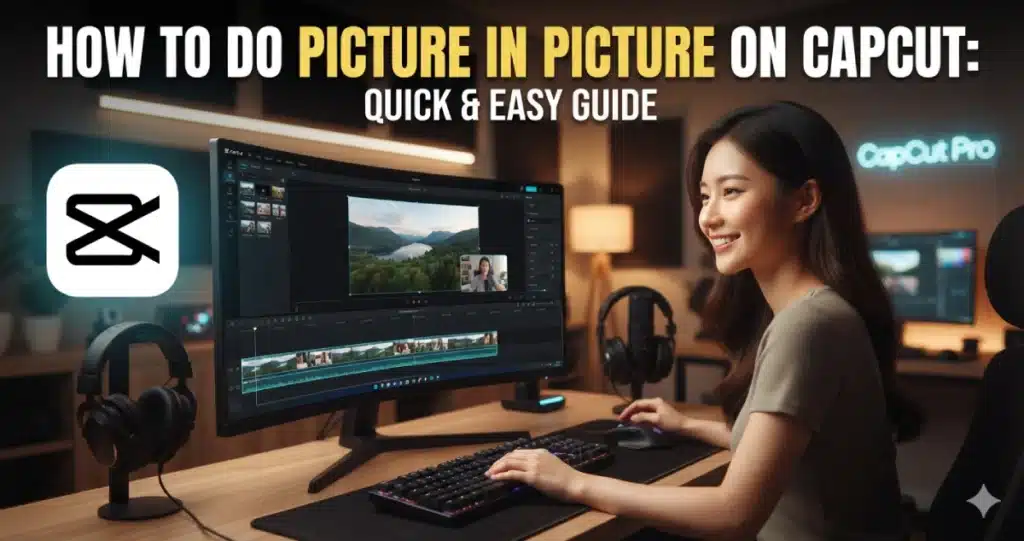
Picture in picture, also called PIP, is an editing technique where a smaller video or image appears over a larger main video.
For example, a gaming creator may show gameplay across the full screen while placing a small face camera in one corner. A tutorial creator may show a screen recording while their face appears in a smaller window.
Here are some common uses:
| PIP Use | Example |
| Reaction videos | Face camera over another video |
| Gaming | Webcam over gameplay |
| Tutorials | Presenter over screen recording |
| Product reviews | Product clip over main video |
| Education | Teacher over presentation |
| Interviews | Second person shown on screen |
The effect works by placing visual content on separate layers.
How to Do Picture in Picture on CapCut on Android?
Open CapCut and create a new project. Add the video you want to use as your main background. Once it appears on the timeline, choose Overlay and add the second video.
The new clip will show as an overlay above your video. Tap the clip to resize it with your fingers. Move it to a corner or another area while keeping the video easy to see.
Adjust the overlay on the timeline to control when it appears and disappears. You can also trim the clip separately from your main video.
If Android is your main editing platform, our CapCut for Android page can help with other mobile features and setup information.
How to Resize and Position a PIP Video?
Select the smaller video and resize it directly in the preview. The PIP window should be large enough for viewers to understand but small enough to keep the main content visible.
For gaming and reaction videos, one of the corners usually works well. However, check what appears in that area throughout the complete video. You do not want your face camera covering subtitles, game scores, maps, buttons, or important actions.
Do not rely on a computer preview for your Picture In Picture effect. Always check how it looks on a phone. Most people who watch TikTok, Reels and Shorts videos use devices. A Picture In Picture window can appear smaller, on a mobile screen.
How to Do Picture in Picture on CapCut on iPhone?
The process on the iPhone is very similar to Android. Create a project and add your main footage first. Then select the overlay option and import the second video you want to display.
Resize the overlay and drag it to your preferred position. Adjust its timeline duration so the smaller video appears only when needed.
You can also trim, split, animate, or customize the PIP layer without changing your main footage. If you mainly use an iPhone or iPad, our CapCut for iOS page provides more information about editing on Apple mobile devices.
Before exporting, watch the complete video to make sure your smaller window never blocks important parts of the main footage.
How to Do Picture in Picture on CapCut PC?
CapCut on desktop gives you more timeline space, which can make picture in picture editing easier.
Add your video and your extra video to CapCut. Put your video on the main timeline and move your second video to a track on top of it. Then you tap your video, make it smaller from the preview panel and put it in the right spot.
Adjust the beginning and end of the upper clip to control how long the PIP video stays visible.
If you prefer editing on Windows, our CapCut for PC page is a useful related resource.
The larger desktop preview also makes it easier to position several visual layers accurately without making your screen feel crowded.
How to Make Picture in Picture on CapCut Mac?
Mac users can follow almost the same desktop workflow. Import both clips and place the smaller video on a track above your main footage.
Select the upper clip, reduce its size, and move it to a suitable area. Adjust its timeline length and preview the complete section.
Our CapCut for Mac page can provide more information for readers editing on a MacBook or iMac.
Keep some space between the smaller window and the edge of your frame. This usually creates a cleaner layout and helps prevent important content from sitting too close to the screen border.
How to Use Overlays for Picture in Picture?
Overlays are the base of making picture in picture videos on CapCut mobile. Your original video stays in the part and you add another video on top of it.
The separate overlay layer lets you control your video by itself. You can make it bigger or smaller, move it, make it longer or shorter or add effects without changing your video.
You can also add more than one overlay. However, avoid filling the screen with too many small videos unless your content actually needs them.
If you are new to layers, our guide about using overlays in CapCut explains the overlay process in more detail.
How to Make a Round Picture in Picture Video?
A circular PIP window can look cleaner than a normal rectangle, especially for gaming, reaction videos, and tutorials.
Add the second video as an overlay and select it. Open the Mask and choose a circular shape when available. Position and resize the circle until your face or subject fits properly inside it.
If you want edges you can change the feathering level in CapCut. Just do not make it too blurry. A blurry border will make your video look bad.
Our guide on CapCut masks has a lot of information. You can learn about all the shapes of CapCut masks and how to use the feathering controls. This will help you use CapCut masks in your videos.
A circular window also takes up less visual space, which can help keep more of your main content visible.
How to Move a PIP Video With Keyframes?
Your PIP window does not need to stay in one corner for the whole video. You can move it when it begins covering something important.
Keyframes are useful for this. Set the starting position of your smaller video and add a keyframe. Move forward on the timeline and reposition the PIP window. CapCut can create movement between supported keyframe points.
For example, your face camera can begin in the bottom right corner and move to the upper left when text appears underneath it.
Our how to make smooth keyframes in CapCut PC guide provides more information about creating controlled movement.
How to Add Animation to a PIP Video?
Animations can make your smaller video enter or leave the screen more smoothly. Depending on your CapCut version, you may find different entrance, exit, or combination animations.
Choose something that matches your content. A quick movement can work for short social videos, while a simple fade may look better in tutorials or educational content.
If you put many animations in your PIP video it can be distracting. The purpose of picture in picture is to help the video so the animations should be subtle and not the main thing people see.
How to Use PIP for Reaction, Gaming and Tutorial Videos?
Reaction videos usually place the creator’s face in one corner while the main content remains large. Keep your reaction window away from subtitles and other important information.
Gaming videos use a similar setup. Before positioning your face camera, check where the game displays health bars, maps, scores, and controls.
For tutorials, you can show a screen recording as the main footage while your face appears in a smaller window. Move the PIP when it covers a menu or button you are explaining.
You can also stop on an important screen while explaining it. Our guide on how to freeze frame in CapCut explains how to create that effect.
Can You Use an Image for Picture in Picture?
Yes. Your smaller layer does not have to be another video. You can add an image over your main footage and use it in a similar way.
This feature is useful for showing visuals, like screenshots and logos and product images and charts and examples. I can resize the image. Place it wherever needed and adjust its duration to match my video.
Keep images until viewers have enough time to understand the information they provide. After the image has done its job remove it to avoid distractions.
Can You Create PIP With CapCut APK?
Picture in picture can be created with the overlay tools available in supported Android versions of CapCut.
If you use CapCut APK Download, add your main footage and look for the Overlay option or similar layer controls. Import your second video, then resize and reposition it.
The exact interface can change between releases. Older versions may place certain controls in different locations, so do not expect every CapCut tutorial to look exactly like your current screen.
Why Is My PIP Video Not Showing?
First you need to check when your overlay starts on the timeline. If the second clip starts later it will only show up when the playhead gets to that spot.
After that check the PIP placement and size. Sometimes you can move the PIP outside the frame without realizing it or make the PIP too small which makes the PIP really difficult to see.
When the clip does not appear in CapCut even though the settings are right in CapCut Pro and restart it. Then reopen your project. Try adding the video again to check if the source video file has any issues.
Why Is My Picture in Picture Video Blurry?
Using a low-quality video file is a reason for blurry visuals. A small clip can look normal at first. Enlarging it may reduce clarity.
A quality original clip can improve the final output. Avoid resizing and make sure the export settings use the right resolution and quality level.
We have a complete CapCut export settings guide that helps you figure out the settings for TikTok and YouTube and Instagram and other social media platforms.
If you want your video to look good you need to start with good quality PIP footage. Exporting it in a resolution will not help if your original PIP video is not clear.
Common Picture in Picture Mistakes
Making the secondary video too large is one of the most common mistakes. The smaller window should support the main content rather than constantly hiding it.
Placement also matters. Watch the complete video because the main subject may move behind your PIP later. Check both audio tracks as well. If your main video and overlay contain sound, decide which one viewers should hear most clearly.
Finally, keep the design simple. Too many borders, animations, moving windows, and effects can make the screen difficult to follow.
Is CapCut Pro Required for Picture in Picture?
Basic PIP editing can be created using video layers and overlays, although individual tools can vary by CapCut version, platform, account, and region.
Check what your current version offers before upgrading only for picture in picture.
If you regularly use advanced effects, templates, AI tools, and other paid features, CapCut Premium may provide more value across your overall editing workflow.
For more CapCut resources and related editing guides, you can also explore CapCut Pro APK Download through our homepage.
Final Thoughts
CapCut’s picture in picture feature provides an easy way to place two pieces of content on the screen together. It works great for creators making reaction videos, gaming content, tutorials, reviews, and educational videos.
Learning the picture in picture feature in CapCut APK allows you to display visuals at once. It is a tool for creating reaction videos, gaming content, tutorials, product reviews and educational videos.
A simple and clean layout can make your PIP video look better. Avoid placing the smaller window over important content, and use proper timing and positioning instead of adding unnecessary effects.
Frequently Asked Questions
How do I do picture in picture on CapCut?
Add your main video to the timeline and then add another clip as an overlay or upper video layer. Select the second clip, reduce its size, and move it to your preferred position. Adjust its timeline duration and preview the complete video to make sure it does not cover important content.
Can I make picture in picture on CapCut mobile?
Yes. Android and iPhone users can add their main video and then use the overlay feature to import another clip. Resize and reposition the second video in the preview. You can also trim it, apply a mask, add animation, or control when it appears during the project.
How do I make a round PIP video in CapCut?
Add your second video as an overlay and select it. Open the Mask controls and choose a circular shape when available. Resize and reposition the circle around your face or subject. Adjust feathering carefully if needed to create a cleaner edge without making the picture in picture window look blurry.
Can I move a PIP video during my CapCut edit?
It is easy to control the movement of a video with keyframes. First you set its position and add a keyframe. Then you move forward in the timeline. Reposition the clip of the smaller video when needed. This works well when your picture in the picture window blocks important information in the smaller video.
Why is my CapCut PIP video blurry?
The quality of your PIP video depends on the footage and export settings. A low-resolution clip or heavy scaling can create blur. Use a clear source file. Choose higher output settings to keep more details.
Can I use a photo instead of a video for PIP?
Yes. You can use images as layers in your video. Place and resize the photo like a PIP clip then control its timing on the timeline. This is perfect for adding screenshots, logos, product images, charts and other helpful visuals.