How to Mask in CapCut: Complete Masking Guide for Beginners 2026
Introduction
Masking might feel like something but CapCut makes it simple for new people to use. With a mask you can decide which part of a video, picture or extra image shows up. It helps you cover one area and show another which makes your edits more flexible.
CapCut masking is a skill to have when you want to create different video effects. You can make screens and clone effects and smooth transitions. You can make before and after videos and creative overlays. Using keyframes to move the area throughout the clip is also a great idea.
New editors can start with CapCut’s masking tools. CapCut Pro features can help create advanced and detailed edits. This complete guide explains CapCut masking on Android, iPhone, PC and Mac. It also covers feathering, animated moving masks overlays and ways to fix problems that you might encounter.
What Is Masking in CapCut?
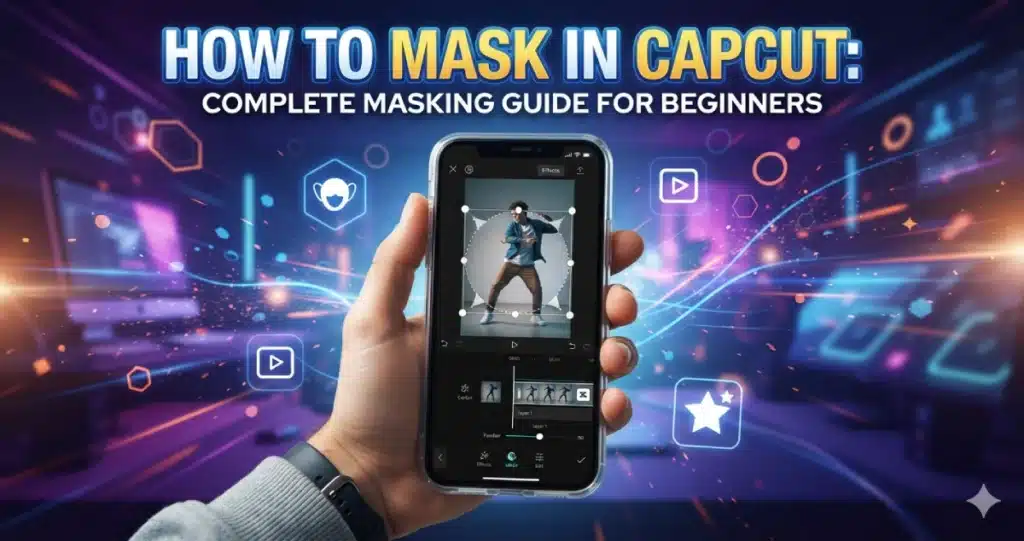
Masking controls which part of a video or image layer is visible. Think of it as placing a window over your video. Everything inside the selected area can remain visible while another part is hidden.
For example, suppose you place two videos on top of each other. Normally, the upper video covers the video below it. By adding a mask to the upper clip, you can hide part of that layer and reveal the lower video.
This simple idea can create many different effects.
| Masking Use | What It Does |
| Split screen | Shows two videos together |
| Clone effect | Shows the same person twice |
| Video blending | Combines parts of two scenes |
| Before and after | Reveals two versions of a scene |
| Transitions | Gradually reveals another clip |
| Creative overlays | Controls which overlay areas appear |
Once you understand how layers work, masking becomes much easier.
How to Mask in CapCut on Android?
The basic process on Android starts by adding your main video and then selecting the clip or overlay you want to mask. If Android is your main editing device, our CapCut for Android page can provide more information about using the mobile version.
Open CapCut and create a new project. Add your main video to the timeline. If you want to combine two videos, add the second video as an overlay and select it.
Find Mask in the editing toolbar and choose the shape you need. Resize the mask and move it over the correct part of your video. You can also adjust its rotation and feathering when those controls are available.
Preview the entire section before exporting. A mask may look correct on one frame but become noticeable when the subject starts moving.
How to Mask in CapCut on iPhone?
Masking on iPhone follows a similar process. Add your main video first, then add another clip as an overlay if your effect requires multiple layers. Select the layer you want to control and open the Mask option.
Choose a mask shape and adjust its size and position. Use feathering when you need a softer border between two clips. Readers who regularly edit on Apple devices can also check our CapCut for iOS guide for platform specific information.
The small screen can make detailed positioning harder. Zoom into the preview when possible and check the edges carefully before finishing your edit.
Different Mask Shapes in CapCut
CapCut can provide different mask shapes depending on the platform and version you use. Common options can include circular, rectangular, split, and other shaped masks.
A circle works well when you want to highlight a face, product, or smaller area. A rectangular mask can reveal a larger section. Split style masks are useful when combining two halves of separate videos.
Choose the mask based on the effect rather than simply picking the most interesting shape. A simple mask that fits the scene usually produces a cleaner result.
What Does Feather Do in CapCut Masking?
Feathering is used to make the edges of a mask look cleaner and nicer. If you do not use feathering your mask will have a line between the parts that you can see and the parts that you cannot see.
I think this way is good for making a split screen look clean. It can look weird when you try to put two scenes that are similar together.
Increase the feathering amount to create a natural-looking edge around the mask with the feathering. Do not apply much feathering. If you do, the scene will look blurry because of the feather effect. The best feathering setting depends on the video content, the lighting, the colors and the editing style you are using with the feathering.
How to Mask in CapCut on PC?
A larger screen makes masking easier because you can see small details around the edges of your mask. If you regularly create desktop projects, our CapCut for PC page is a useful related resource.
Import your main video and place it on the timeline. Add your second video on another layer if required. Select the clip you want to control and find the Mask settings.
Choose your shape, then adjust its size, position, rotation, and feathering. Play the complete section afterward. This is especially important when people or objects move because a mask that works at the beginning may not remain correctly positioned later.
How to Mask in CapCut on Mac?
The process on Mac is similar to PC. Import your videos, arrange them on separate layers, select the upper clip, and apply the mask you want.
The larger preview on a MacBook or iMac makes it easier to check detailed areas. Your CapCut for Mac page can also help readers who want more information about the desktop version.
Pay close attention to movement. If the subject changes position, a fixed mask may no longer cover the correct area. This is where keyframes can become useful.
How to Use Masks With Overlays?
Masks and overlays work very well together. An overlay places one clip over another, while a mask controls which part of that upper clip remains visible.
Imagine recording the same room twice. In one recording, you stand on the left. In the second recording, you stand on the right. You can place the recordings on separate layers and mask part of the upper clip.
Both versions of you can then appear in the same scene.
If you are still learning video layers, our guide about using overlays in CapCut can help you understand the overlay workflow before trying more complex masking effects.
How to Create a Split Screen With a Mask?
A split screen is one of the easiest effects to practice when learning how to mask in CapCut. Add one video to your main timeline and place another above it.
Select the upper video and apply a split or rectangular mask. Move the mask until the required section of the lower video becomes visible. Adjust both clips so the important subjects fit properly within each side.
You can keep the dividing line sharp for a clear split screen. If you want the scenes to blend, add a small amount of feathering.
This technique works well for reaction videos, comparisons, tutorials, and before and after content.
How to Make a Clone Effect With Masking?
A clone effect can make the same person appear twice in one video. The most important part happens before editing. Keep your camera completely still while recording both clips.
Record yourself on one side of the scene. Then record another clip while standing on the opposite side without moving the camera.
Place one recording over the other in CapCut. Add a mask to the upper clip and reveal the correct side of each recording. Feather the edge slightly if the dividing line is visible.
Avoid walking across the mask boundary because the illusion can break when the two recordings overlap.
How to Move a Mask With Keyframes?
A normal mask remains in one place. If your subject moves, you may need to adjust the effect over time.
Keyframes help create controlled movement. Depending on the controls available in your CapCut version, you can change the relevant position as the video progresses.
Start at the beginning and position the effect correctly. Move forward on the timeline and adjust it again as the subject changes position. CapCut creates movement between supported keyframed points.
For more detailed animation techniques, our how to make smooth keyframes in CapCut PC guide is a useful supporting article.
Masking vs Background Removal
Masking and background removal can produce similar results, but they work differently. A mask manually controls which area of a layer appears. Background removal tries to separate a subject from the entire scene behind it.
Use masking when you want a split screen, clone effect, custom reveal, or controlled blend. Use background removal when you mainly want to isolate a person or another subject.
If your goal is to replace the whole scene behind someone, our guide on how to remove background in CapCut provides the more suitable method.
Masking vs AI Object Removal
You can use a mask to hide the parts of a layer that you do not want to see.. Ai object removal is different because it tries to remove things you do not want. Then it rebuilds the background behind them so it looks natural. AI object removal is really good at removing things.
For example, if you want to combine two scenes, use a mask. If you want a bottle or unwanted person to disappear from existing footage, AI removal may make more sense.
Our guide on how to remove objects from video in CapCut explains that process in more detail.
How to Create Mask Transitions?
Masks can also reveal one video gradually over another. This creates a custom transition instead of making an instant cut between scenes.
Place your videos on separate layers. Apply a mask to the upper video and position it where you want the reveal to begin. Use supported movement or keyframe controls to change the effect over time.
Keep the movement smooth. Fast transitions can work well for Shorts and Reels, while slower mask reveals may suit cinematic or travel videos.
Can You Mask Videos Using CapCut APK?
Masking can be available in Android versions of CapCut, although menus and controls may change between releases.
If you use CapCut APK Download, select your video or overlay and check the editing controls for the Mask feature. Older versions may not look exactly like newer tutorials.
This is one reason you should focus on the basic editing process rather than expecting every button to remain in the same position after an update.
Why Can’t I Find the Mask Tool?
First, make sure you selected the correct timeline element. CapCut displays different controls for videos, overlays, text, audio, and effects.
I want to mask a video or overlay so I will choose the video or overlay I want to mask. Then I will check the toolbar again. If the masking option is still not available I will restart CapCut. See if a new update is ready for CapCut.
The CapCut interface may look different on my Android on my iPhone on my Windows and on my Mac so the location shown in another tutorial may not be the same on my device.
Why Does My Mask Have Hard Edges?
Hard edges usually happen when two layers do not blend naturally. Feathering can help soften the border.
Increase the feather amount slowly while watching the preview. Do not automatically use the maximum setting because too much feather can create a visible blurry area.
Also check the clips themselves. Different lighting, camera angles, or colors can make a boundary obvious even when feathering is applied correctly. Similar footage generally blends much more easily.
Why Does My Mask Move Away From the Subject?
A fixed mask does not automatically follow a moving subject. If someone walks across the screen, they may eventually move outside the masked area.
You can use keyframes or other supported tracking controls to adjust the effect as the subject moves. For beginners, footage with limited movement is much easier to mask.
Camera shake can make the problem worse. If your original footage moves too much, our how to stabilize video in CapCut guide can help you improve shaky clips.
Does Masking Reduce Video Quality?
Masking itself does not mean you need to lower your final video quality. Problems are more likely when you heavily enlarge low resolution footage or export the finished project using poor settings.
Start with clear source videos and avoid unnecessary scaling. Once the masking effect is complete, choose suitable resolution, frame rate, and quality settings.
Our best CapCut export settings guide is a useful next resource before saving your finished project.
Tips for Better CapCut Masking
Start with a simple split screen before trying moving masks or complicated effects. This helps you understand visible and hidden areas without adding too many controls at once.
For clone effects, keep the camera completely still and try to maintain the same lighting between recordings. Use feathering carefully and keep the mask boundary away from moving people whenever possible.
Most importantly, preview the entire clip. Do not judge a mask from one paused frame. Watch how the subject, background, shadows, and mask edges behave throughout the video.
Is CapCut Pro Required for Masking?
Basic masking availability can depend on the CapCut version, device, platform, account, and region. Check the tools available in your current version before upgrading for one specific feature.
If you regularly use advanced effects, AI tools, templates, cloud features, and other paid resources, CapCut Premium may provide more value across your overall editing workflow.
For more CapCut versions, features, and related editing resources, you can also explore CapCut Pro APK Download through our homepage.
Final Thoughts
Check that you have the video clip or overlay selected. CapCut will show you tools for each thing in your timeline. If you do not see Mask try restarting the app or get the update. The Mask option can be in places on your mobile PC, Mac and different versions of CapCut.
Learn the basics by trying simple video effects and adjusting the mask position and the mask size and the mask edge softness. Once you know how these controls work you can add the overlays and the keyframes to create dynamic video edits.
Learn the basics by trying simple video effects and adjusting the mask position and the mask size and the mask edge softness. Once you know how these controls work you can add the overlays and the keyframes to create dynamic video edits.
Masking does not need to be complicated. A simple mask placed correctly can often create a cleaner and more professional result than adding several unnecessary effects.
Frequently Asked Questions
How do I mask in CapCut?
Add the video file to CapCut and select the layer that you want to control whether it is a clip or overlay. Open the Mask feature. Choose your preferred shape. Place and resize the mask over the area, adjust feathering for natural edges and preview the section before exporting.
What does masking do in CapCut?
A mask controls the areas of a video, image or overlay. It allows another layer below to appear and helps create effects like split screens, clone videos, transitions, blended scenes and creative reveals. You can adjust the mask size, position, shape and softness of the edges for results.
How do I feather a mask in CapCut?
Open your clip and adjust the feather option to get the look you want. More feather makes the edge between the masked part and the unmasked part look softer. Add feather slowly. Stop when it looks natural. If you add much feather your video can look blurry.
Can I make a moving mask in CapCut?
CapCut has things like keyframes that let you make effects move. Put the effect at the start of your video, move forward in time and change the mask when the thing you are looking at moves. If the movement is really detailed you might have to make changes to get everything to work smoothly.
Can I make a clone effect using CapCut masks?
Yes. Record two versions of yourself in positions. Do not move the camera. Put one video on top of the other. Use a mask to combine both clips. Keep the lighting the same. Avoid crossing the mask area for a cleaner effect.
Why can’t I find a mask in CapCut?
Check you have the video clip or overlay selected. CapCut gives you tools for each thing in the timeline. If you cannot find the Mask tool, restart the app. Get the latest update. The Mask feature can be in places on mobile PC, Mac and different CapCut versions.