How to Remove Objects From Video in CapCut Using AI 2026
Introduction
You make a good video but when you look at it you see something you do not want in the background. This could be a person behind you, something on a table, a sign or something that takes your attention away. Doing the thing again is not always something you can do.
Learning how to remove objects from video in CapCut can help in situations like these. CapCut includes AI based editing tools that can identify unwanted areas and rebuild parts of a scene. The result depends on the video, movement, background, and the tools available in your version.
You do not need to be an expert editor to get started. Some advanced AI features may vary between the free version and CapCut Pro APK, but there are also manual methods you can try when automatic removal does not give a clean result.
This guide covers object removal on mobile and desktop, along with people removal, moving objects, AI limitations, common problems, and tips for getting a more natural result.
What Is AI Object Removal in CapCut?
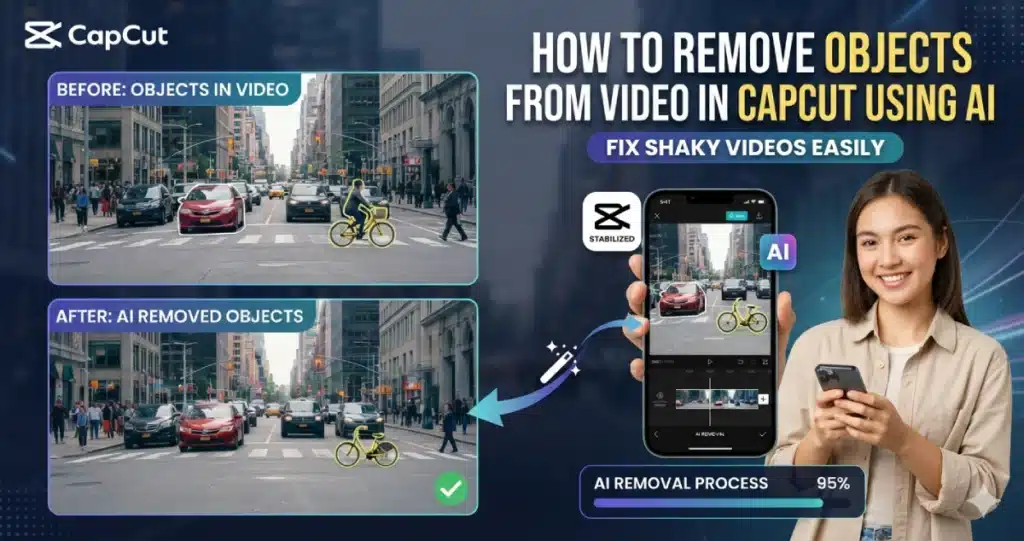
AI object removal lets you select an unwanted part of a video and try to erase it from the scene.
The AI analyzes the surrounding pixels and frames. It then tries to fill the empty area using information from the background.
For instance you are filming a product on a table. There is a small cup next to the product. You want to remove the cup without changing the shot of the product on the table. An AI object removal tool can help you delete the cup and recreate the background of the table naturally. This way the product on the table will look great.
This can work with different types of unwanted elements.
| Unwanted Element | Object Removal May Help |
| Small background object | Yes |
| Person in the distance | Often |
| Sign or simple item | Often |
| Moving person | Depends on movement |
| Large foreground object | More difficult |
| Object covering the main subject | Difficult |
| Complex moving background | More difficult |
The cleaner and simpler the scene is, the easier it usually is for AI to rebuild the missing area.
Why Remove Objects From a Video?
Unwanted objects can pull attention away from your subject.
Sometimes when you make a travel video someone walks into the background by mistake.. You make a product video and there is a cable, bottle or bag in it that you forgot to move before you started filming.
Sometimes when you are shooting a video small distractions are not noticed.. When you are editing the video these small distractions can become a big issue.
Object removal can help you:
- Clean distracting backgrounds
- Remove unwanted people
- Improve product videos
- Fix travel footage
- Make social videos cleaner
- Remove small objects from a scene
- Improve the focus on your main subject
- Save footage instead of recording it again
The removal tool can save you a lot of time. It does not work perfectly for every single problem. There are times when using crop or mask or blur effects can make your video look a lot cleaner and nicer.
How Does CapCut AI Remove Objects From Video?
AI removal is different from simply deleting part of a frame.
If you erase an object, something needs to replace the area that was behind it. CapCut’s AI based tools can analyze nearby visual information and attempt to create a believable replacement.
Think of a wall behind a small picture frame.
If you remove the picture frame, the AI can look at the wall around it and estimate what should appear in the empty area.
Simple backgrounds are easier.
A plain wall, sky, floor, grass, or table may be easier to rebuild than a detailed crowd or moving patterned background.
The AI has a harder job when both the object and camera are moving.
How to Remove Objects From Video in CapCut on Android?
The exact AI removal options can change between CapCut versions. If an object removal or AI erase tool is available in your Android version, the basic process is usually simple.
Readers who edit mainly on phones can also check our CapCut for Android page for more information about the Android version.
Steps to Remove an Object on Android
- Open CapCut on your Android phone.
- Tap New Project.
- Select the video containing the unwanted object.
- Add the video to your timeline.
- Select the video clip.
- Look through the editing or AI tools available in your version.
- Open the object removal or AI erase option when available.
- Mark or brush over the unwanted object.
- Make sure your selection covers the full object.
- Let CapCut analyze the selected area.
- Preview the result.
- Check several frames around the edited section.
- Make another adjustment if necessary.
- Export the video when the result looks natural.
Tool names and locations can change as CapCut updates its interface. If your screen does not match an older tutorial, check the current AI and video editing menus instead of assuming the feature has disappeared.
How to Select an Object Properly?
Your selection can make a big difference to the final result.
Do not make a choice and hope the artificial intelligence understands what you want. Choose the thing you do not want so the tool can remove artificial intelligence object removal properly.
Cover the complete object, including its edges.
At the same time, avoid selecting a huge area around it. The more background you ask the AI to recreate, the harder the task becomes.
A good selection should:
- Cover the full unwanted object
- Include its visible edges
- Avoid the main subject
- Stay as small as reasonably possible
- Follow the object’s shape when possible
If the first result looks strange, undo the edit and try a cleaner selection.
How to Remove Objects From Video in CapCut on iPhone?
iPhone users can follow a similar workflow when the required AI tool is available.
If you regularly create content on an iPhone or iPad, your CapCut for iOS page is a useful related resource for readers who want more platform specific information.
Steps for iPhone
- Launch CapCut.
- Create a New Project.
- Import the video from Photos.
- Select the clip on your timeline.
- Open the available AI or editing tools.
- Choose the object removal option if available.
- Mark the unwanted item carefully.
- Allow CapCut to process the area.
- Watch the edited part several times.
- Look for unusual edges or background movement.
- Adjust the selection if needed.
- Export your finished video.
A small screen can make detailed selections harder. Zoom into the preview when possible so you do not accidentally include part of your subject.
How to Remove Objects From Video in CapCut on PC?
PC can be a better choice for detailed object removal because you have a larger preview.
It is easier to see small errors, especially around people, products, signs, and objects with complicated edges.
Creators working with larger projects can use CapCut for PC for a more spacious editing workflow.
Remove an Object on PC
- Open CapCut on your computer.
- Start a new project.
- Import the video you want to clean.
- Drag the video onto the timeline.
- Select the clip.
- Open the available AI editing tools.
- Choose the relevant object removal or AI erase feature.
- Select the unwanted object.
- Keep the selection close to its edges.
- Start the AI processing.
- Preview the edited section.
- Check the frames before and after the object disappears.
- Make corrections if necessary.
- Export the finished video.
Desktop editing can be especially helpful when you need to remove a smaller object. A large preview makes poor AI filling easier to spot.
How to Remove an Object From Video in CapCut on Mac?
Mac users can use a similar desktop workflow.
The exact controls can depend on the current CapCut release, but the basic idea remains the same. Select the unwanted area and let the available AI tool process it.
If you edit on a MacBook or iMac, our CapCut for Mac guide can help with the wider desktop setup.
Basic Mac Steps
- Open CapCut.
- Import your video into a new project.
- Add the clip to the timeline.
- Select the video.
- Open the available AI editing controls.
- Mark the object you want to erase.
- Start processing.
- Preview the edited footage.
- Check the background around the removed object.
- Adjust the selection if necessary.
- Export your final video.
Do not judge the result from a single frame. Video is constantly moving, so an area that looks perfect in one frame can look strange a second later.
How to Remove a Person From a Video in CapCut?
Removing a person can be more difficult than removing a small object.
A person may move their arms, walk across the frame, create shadows, or cover different parts of the background.
AI has to rebuild all those areas.
For the best chance of success, the person should:
- Stay away from your main subject
- Be relatively small in the frame
- Move against a simple background
- Avoid covering important objects
- Have clear edges
For example, removing someone walking across a distant beach may work better than removing a person standing directly in front of a detailed shop.
If the person is near the edge, cropping may sometimes be the easier solution.
How to Remove a Moving Object From Video?
Moving objects are more difficult because their position changes from frame to frame.
Imagine a car driving behind your subject. At the beginning, it covers one part of the road. A second later, it covers another part.
The editing tool has to understand the movement and rebuild several different background areas.
When working with a moving object:
- Keep the clip as short as possible.
- Select the object carefully.
- Preview the full movement.
- Check where the object enters the frame.
- Check where it leaves.
- Look for flickering or strange textures.
If automatic removal struggles, another technique may give you a cleaner result.
Object Removal vs Background Removal
These features sound similar, but they solve different problems.
Object removal tries to erase one selected item while keeping most of the original scene.
Background removal separates your main subject from the entire background.
| Situation | Better Tool |
| Remove bottle from table | Object removal |
| Remove person in distance | Object removal |
| Replace entire room | Background removal |
| Put yourself over another video | Background removal |
| Remove small sign | Object removal |
| Create transparent subject | Background removal |
If you want to replace the complete scene, your existing guide on how to remove background in CapCut is more useful than an object removal method.
Object Removal vs Background Blur
Sometimes you do not actually need to erase the unwanted object.
Background blur works when there are things you do not want behind your subject. It hides the distracting things without changing the part of your video.
For example, imagine several people walking far behind you. Removing each person separately may create visual errors. A soft background blur can make them less distracting without requiring perfect AI removal.
Your published guide on how to blur background in CapCut is a natural next resource for this situation.
Choose removal when the object really needs to disappear. Choose blur when you only want it to attract less attention.
Can You Remove Objects With a Mask?
Yes, masking can sometimes help when AI removal does not give a good result.
A mask controls which part of a layer remains visible.
Lots of people edit videos by adding a part of the footage over the bad area. They use a mask to show the good part that they want to use.
This works best when:
- The camera stays still
- The background does not change much
- You have a clean part of the scene
- The unwanted object stays in one area
It takes time and attention compared to automatic removal but manual editing methods can help you achieve a cleaner and more professional-looking video when you are editing.
Can You Use Overlays to Hide an Unwanted Object?
Yes.
An overlay can be useful when removing the object perfectly is not necessary.
For example, you might cover an unwanted area with:
- Another video layer
- An image
- Text
- A graphic
- A sticker
- A blurred section
This can be useful for short social media videos where the covered area already makes sense in the design.
Your guide about using overlays in CapCut can help readers who want to build this type of layered edit.
How to Remove an Object With a Static Camera?
Object removal is often easier when the camera does not move.
You might record a person sitting at a desk. Find an unwanted bottle visible on the table after looking at the footage.
The camera isn’t moving. The area behind the bottle looks the same from the beginning to the end of the video.
AI has more consistent visual information to work with.
This is why recording with a tripod can make object removal much easier before you begin the editing process.
If you want to clean up your video you should keep the camera still while you are recording. This helps you get results when you are removing things from the video. A stable shot is really important.
What Happens When the Camera Moves?
Camera movement makes object removal more difficult.
The background changes as the camera pans, tilts, or moves forward. AI must understand both the unwanted object and the changing scene behind it.
If the footage is also shaky, consider correcting the camera movement first.
Your guide on stabilizing video in CapCut can help in this situation. Smoother footage may make editing easier. Stabilization does not always ensure perfect object removal results.
Try to solve one problem at a time.
Can You Remove Objects From CapCut APK Videos?
Object removal depends on the editing tools available in the installed version rather than the way your original video was recorded.
If you use CapCut APK Download on Android, feature availability may vary by version. Older builds may have different AI tools or menu layouts compared with current releases.
Check your installed version if a tutorial shows an option that you cannot find.
Be careful before you use versions of apps. These modified versions might offer some changes. They can also cause problems with security and stability.
Why Is the AI Object Removal Tool Missing?
There are several possible reasons.
CapCut changes its tools over time. Some AI features can also depend on:
- App version
- Platform
- Device
- Account
- Region
- Subscription plan
- Internet availability
First, update CapCut and check the current editing menus.
Do not assume that every screenshot from an old tutorial will match your current interface.
If several AI features are missing or not loading, your published guide about CapCut AI features can provide more information about the app’s AI editing tools.
Why Is CapCut Not Removing the Object Properly?
AI removal is not perfect.
Sometimes you may still see a shadow, blurry patch, repeated texture, or strange shape where the object used to be.
This often happens when:
- The object is very large
- The background is complicated
- The camera moves quickly
- The object covers another person
- Lighting changes
- Shadows move with the object
- The video has low resolution
- The object moves rapidly
Try making a more accurate selection.
If that does not help, consider another editing method instead of repeatedly processing the same area.
Why Does the Removed Area Look Blurry?
CapCut needs to create new visual information where the object was located.
If the surrounding background has very little useful information, the recreated area may look soft or blurry.
This is especially noticeable on:
- Textured walls
- Detailed floors
- Crowds
- Hair
- Moving water
- Patterned clothing
- Signs with text
A blurry patch may be less noticeable in a fast moving clip than in a still shot.
Always watch your video at speed before deciding if the result looks good. Some issues may only become visible during playback.
Why Does the Background Flicker After Object Removal?
Flickering usually happens because the recreated area changes slightly between frames.
One frame may look correct, but the next frame may contain a different texture.
This creates a flashing or moving patch.
To reduce the problem:
- Use a shorter clip.
- Make a cleaner selection.
- Avoid selecting unnecessary backgrounds.
- Use simpler footage where possible.
- Try another removal method.
- Cover minor errors with a subtle blur if appropriate.
Do not keep increasing effects to hide a bad result. Sometimes starting with a different technique is faster.
Can CapCut Remove Text From a Video?
AI object removal may help with some text when the background behind it is simple.
For example, text placed over a plain wall may be easier to remove than text covering a person’s face.
The result depends on whether CapCut can rebuild the missing area.
If the text is close to an edge, cropping might be easier.
If the text is only in one small area, blur or overlay methods may also work.
Be careful when removing ownership marks or identifying information from content you do not own. Use editing tools on footage you have the right to modify.
Can CapCut Remove Logos From Videos?
Technically, an object removal tool may treat a logo like another visual element. However, whether you should remove it is a different question.
Taking out the parts that say who made something without asking can get you into trouble because it is not right.
Your videos are yours to edit. So you can remove logos, signs or product marks if you have the right to make changes.
The best way to remove a logo is to think about where the logo’s what is behind the logo.
Can CapCut Remove a Watermark?
AI tools can take out things you do not want to see in videos but you should only do this when you have permission to change the video.
If a watermark is from another creator, taking it away could cause problems with copyright. Giving the right credit.
When you are editing your CapCut project removing branding is a bit different. You should check out your guide on removing the CapCut watermark. This will be more helpful to you.
Does AI Object Removal Reduce Video Quality?
The original parts of your video do not automatically need to become lower resolution because you removed an object.
However, the recreated area may contain less detail than the original scene.
Export settings also matter.
A good export setting helps keep the details in your video. If your video is 1080p use 1080p export. If your video is 4K use an option if your device can handle it.
Your published guide about the best CapCut export settings can help readers choose the right settings after finishing an AI edit.
Does AI Object Removal Need Internet?
Some AI based tools can depend on online processing or downloaded resources. Availability can vary between versions and platforms.
If an AI feature refuses to load, first check your connection.
If CapCut itself says it cannot connect, your CapCut no internet connection fix article is a useful internal link here.
Once processing is complete, basic timeline editing may not always require the same connection. However, online features can still need internet access.
Why Is AI Object Removal Taking So Long?
AI needs time to analyze the selected object and surrounding video frames.
Processing can take longer when:
- The video is long
- Resolution is high
- The object moves
- The camera moves
- The selected area is large
- Your device is slower
- Storage is low
- Other apps are running
Trim the video before processing whenever possible.
If you only need to remove an object from five seconds of a two minute clip, split that section first.
There is no reason to make the app analyze more footage than necessary.
What to Do If CapCut Crashes During AI Removal?
AI editing can be demanding on older devices.
If CapCut crashes:
- Close background apps.
- Restart CapCut.
- Free some storage.
- Try a shorter clip.
- Reduce other heavy effects.
- Restart your phone or computer.
- Update CapCut.
- Try the AI edit again.
If crashes happen throughout the application, your existing CapCut app crashing guide can help readers troubleshoot the larger problem.
Does Object Removal Cause CapCut Lag?
It can make a project heavier, especially when several AI effects are used together.
You may notice slower previews after adding object removal, background effects, overlays, color adjustments, and other layers.
This does not always mean the exported video will lag.
If editing becomes difficult:
- Close other applications.
- Reduce preview quality.
- Remove unused effects.
- Work with shorter clips.
- Restart the app.
For wider performance problems, your CapCut lag fix article is a useful supporting resource.
Best Types of Videos for AI Object Removal
Some footage gives AI a much easier job.
Object removal tends to work better when:
- The background is simple
- The camera is stable
- The unwanted object is small
- Lighting stays consistent
- The object does not cover the main subject
- Movement is limited
- The footage is clear
Good examples include product videos, simple indoor shots, landscape clips, and static camera recordings.
Difficult Videos for AI Object Removal
The tool may struggle with:
- Crowded scenes
- Fast sports footage
- Large moving objects
- Detailed backgrounds
- Strong camera movement
- Low light video
- Heavy motion blur
- Objects covering faces
- Reflections
- Moving shadows
AI can still surprise you, so testing the tool is worthwhile. Just do not expect every clip to become perfect with one tap.
AI Object Removal vs Cropping
Cropping is often overlooked because AI sounds more advanced.
When the thing you don’t want is, near the edge of your video a simple cut might be the option. It is fast, clean and easy to do.
| Situation | Better Option |
| Small object near edge | Crop |
| Object near center | AI removal |
| Person far in background | AI removal |
| Distracting full background | Blur or background removal |
| Moving object over complex scene | Test AI, mask, or crop |
| Object covering main subject | Difficult with any method |
Use the simplest tool that gives you a good result.
Advanced does not always mean better.
AI Object Removal vs Green Screen
Green screen editing is useful when you can plan the recording before you shoot.
Object removal is useful when the footage already exists and you discover an unwanted element later.
With a green screen, you can replace a large background cleanly. AI object removal is more suitable for removing individual distractions.
If you want more control during planned recordings, your how to use green screen on CapCut guide explains that workflow in detail.
How to Get Better AI Object Removal Results?
A few small choices can improve the result.
Use High Quality Footage
Clear video gives AI more visual information.
Keep the Selection Tight
Select the unwanted object without covering a large part of the surrounding scene.
Work With Short Sections
Shorter clips process faster and are easier to check.
Stabilize When Necessary
Strong camera shake can make frame by frame rebuilding harder.
Watch the Entire Edit
Do not check only one frame.
Try More Than Once
A slightly different selection can sometimes produce a better result.
Know When to Stop
If AI keeps creating obvious errors, use blur, cropping, masks, or overlays instead.
Pro Tips for Cleaner Object Removal
Plan your recording when possible. Moving an unwanted bottle before filming is always easier than removing it afterward.
Keep the camera stable.
Record in good lighting.
Avoid letting unwanted objects cross directly over your subject.
Use AI removal for smaller distractions rather than trying to rebuild half the frame.
Check shadows as well as the object itself. Removing an object while leaving its shadow behind can look strange.
Preview at normal speed. Some tiny errors that look obvious while paused are almost invisible during playback.
Most importantly, use the method that looks natural. Viewers care about the final video, not which editing tool you used.
Is CapCut Pro Required for AI Object Removal?
Some AI and advanced editing features may depend on your CapCut version, platform, region, account, or subscription plan.
Feature access can change over time.
Check what your current version offers before upgrading only for one tool.
If you regularly use AI editing, premium effects, advanced templates, cloud features, and other paid tools, CapCut Premium may offer more value across your full editing workflow.
Is AI Object Removal Good for Beginners?
Yes, when the automatic tool works well with your footage.
You do not need to rebuild the background frame by frame manually. Select the unwanted item and allow the AI tool to handle most of the work.
The important skill is knowing what footage works well.
Start with a small object against a simple background. Once you understand the tool’s limits, try more difficult edits.
This is much easier than beginning with a moving person in a crowded scene.
Quick Checklist Before Exporting
Before saving your edited video, check:
- Is the unwanted object completely gone?
- Did CapCut remove part of your main subject?
- Does the rebuilt background look natural?
- Are there blurry patches?
- Does the area flicker?
- Is an unwanted shadow still visible?
- Does the edit look good during movement?
- Is your export resolution correct?
- Have you watched the full video?
If the result looks natural, you are ready to export.
For a lot of things about editing with CapCut you can go to the CapCut Pro APK Download page. The CapCut Pro APK Download page has features and guides and other things about CapCut.
Final Thoughts
This CapCut editing technique is very helpful. It helps you remove things from your videos that you do not want. The good thing about this CapCut technique is that it uses intelligence. This means you do not have to change each frame of your video one by one. It is a lot simpler to use CapCut with intelligence.
The best results usually come from simple footage. Keep the camera stable, use clear video, select the unwanted object carefully, and work with short sections when possible.
AI removal is useful, but it is not always the best solution. Cropping may work better for an object near the edge. Background blur can hide distant distractions. Masks and overlays can help when automatic removal struggles.
Try the simplest method first. Then check the entire edited section before exporting. If the removed area looks natural while the video is actually playing, the edit has done its job.
Frequently Asked Questions
How do I remove objects from a video in CapCut?
Import your video into CapCut and select the clip. Open the available AI editing or object removal tool, then carefully mark the unwanted object. Let CapCut analyze the selected area and rebuild the background. Preview several frames afterward because the result can change as objects or the camera move.
Can CapCut AI remove a person from a video?
CapCut’s available AI removal tools may help remove a person, especially when the person is small and stands against a simple background. Results become harder when the person moves quickly, covers the main subject, or appears in a detailed scene. Always preview the entire edited section before exporting.
Can I remove moving objects from a video in CapCut?
Moving objects can be removed in some situations, but they are more difficult than static objects because their position changes between frames. Keep the clip short and check the full movement carefully. If automatic removal creates flickering or strange textures, masking, cropping, overlays, or blur may work better.
Why can’t I find object removal in CapCut?
What you see in CapCut is not the same for everyone. It depends on the device, the version of the app, where you’re the account, the platform and the plan. You should keep CapCut up, to date so you can use the AI tools.CapCut changes its interface over time, so an option shown in an older tutorial may appear somewhere different in your current version.
Why does CapCut leave a blurry area after removing an object?
AI has to create new visual information to replace the object. If the background is detailed or the object covers a large area, the recreated section may look soft. Try selecting a smaller area or use a different method when the background contains complicated textures, movement, or important details.
Does CapCut object removal work on PC?
Available CapCut desktop AI tools can be used for object related editing when supported by the current version. PC also gives you a larger preview, which makes detailed selections easier to inspect. Check the complete edited section rather than one frame because AI generated areas may change during movement.
Does removing an object lower video quality?
Removing an object does not require you to export the whole project at a low resolution, but the AI generated area may contain less detail than the original footage. Use a high quality source and suitable export settings. Complex backgrounds are more likely to show visible differences after AI reconstruction.
Can I remove an object without CapCut Pro?
The availability of AI object removal and related features can vary by version, platform, region, account, and plan. Check your current editing tools first.If you cannot use the AI removal feature do not worry. You can use fashioned editing methods like cropping, masks, overlays or background blur to cover up unwanted things.