Change Voices and Create Fun Audio Effects With CapCut
Don’t want to re-record an entire clip just because your voice sounds off, or you’d rather have a character voice instead of your own? That’s basically the whole use case for CapCut’s voice changer — record or import audio, drop an effect on it, preview it right there in your project, and move on. No separate audio software, no re-tracking dialogue from scratch.
It’s a choice for videos that need a different voice. Things like videos, short clips, stories, funny videos, videos with characters, funny videos, videos with reactions and guides can all use it. The choices you see might be different from someone else’s because it depends on which version you’re using, what device you have your account and where you’re from.
CapCut Pro APK users may see some additional audio tools depending on their build, but the main process below stays the same either way.

What CapCut Voice Changer Actually Does?
It’s an audio tool that alters how a recorded voice sounds — instead of your natural voice, you get something processed: deeper, higher-pitched, robotic, distorted, comedic, or built for a specific character. Exactly which styles are on offer varies by version, but those are the general categories you’ll run into.
Useful for gaming videos, funny Shorts, TikTok and Reels content, character-driven clips, storytelling, memes, reaction videos, tutorials, general entertainment content — pretty broad territory. What actually fits comes down to the tone of your specific video, not a universal “best” effect.
The Basic Workflow
Start a new project and get your video in. Select the clip that has the voice you want to touch, open up the audio editing tools, and look for a voice effects or voice changer option — again, naming and placement shift a bit by version.
Honestly? The preview step matters. Choose an effect first. See how it feels with your clip. If it works, apply it and make any final changes to timing, volume, or other settings before export.
Here’s the thing — mobile and desktop can have slightly different layouts. A screenshot from one version might not look exactly the same on the other.
On Android
Open your project, bring in your footage, and select the clip with the voice you’re editing. Head into the audio tools, find the voice effects section, and browse what’s there — tap through a few to hear how each one actually sounds against your recording before committing.
Our CapCut Android guide has more general mobile editing tips. If nothing’s showing up under voice effects, double-check that your version actually supports the feature and that you’ve got the right clip selected — an easy thing to miss.
On iPhone
Same basic idea. New project, import your footage, select the clip with your voice on it, dig into the audio tools, and find the voice-changing option. Preview a few, apply whichever fits.
Our CapCut iOS guide covers more iPhone/iPad specifics. One thing worth doing before you export — listen through the whole thing with headphones. Voice effects can sound noticeably different through tiny phone speakers versus proper audio, and you don’t want to discover that after publishing.
On PC
What do you do first? Bring in your video or audio. Add it to the timeline, select the clip, and open the audio editing panel. Look through the voice effects options, choose an effect, and check the preview.
Our CapCut PC guide has more on the Windows experience. Desktop’s genuinely nice for longer narration work — the bigger timeline just makes it easier to isolate and adjust specific audio sections without everything feeling cramped.
On Mac
Same workflow. Import your footage, select the voice clip, open the audio tools, and try a few different effects until something fits.
Our CapCut Mac guide covers more macOS-specific notes. For longer recordings, it’s often worth splitting the narration into chunks first — that way you can apply different effects to different sections instead of being locked into one setting for the whole thing.
What Kinds of Effects Are Actually There?
That’s the tricky part — there isn’t always one fixed list. Different versions and platforms can offer different choices. The main direction stays similar with deep, high-pitched, robotic, distorted, funny, and character-style voices.
Worth actually thinking about your video’s purpose before picking one — don’t just grab whatever sounds most unusual. A robotic effect might be perfect for a gaming character bit and completely wrong for an educational tutorial. Match the tool to the content, not the other way around.
Using It for Gaming Content
This is genuinely one of the more popular use cases. You might switch voices for different characters, jokes, reactions, or short in-game bits — sticking with your natural voice for commentary and swapping to an effect when you’re voicing a character, for instance.
Keep whatever effect you’re using clear enough that people can actually follow what you’re saying — a cool voice that’s unintelligible defeats the purpose. And if there’s background music running alongside it, make sure it’s not drowning out the processed voice. Our guide on adding music to CapCut covers balancing that.
Building a Funny Voice
Works well for memes, Shorts, TikTok, and reaction content generally. Record cleanly first, then actually test a handful of effects rather than committing to the first one that made you laugh.
A short clip usually lands better than dragging an unusual voice effect across an entire long video — the joke wears thin fast. Pairing the voice with animated text can help too. Our text animation guide covers syncing moving text to audio timing. Here’s the thing — a funny voice only works when people can still follow the joke. Avoid pushing the distortion too far, or the words might become impossible to understand.
Getting a Convincing Deep Voice
If your version has a deep voice option, select your recording and apply it, then actually listen back critically — the result still needs to be understandable, not just deeper. If speech starts getting muddy, try a different preset or dial back the intensity if that control’s available to you.
Worth stressing: record cleanly to begin with. A shaky, low-quality original recording tends to get worse, not better, once it’s run through a heavy effect like this.
Building a Robot Voice
This one’s a natural fit for futuristic content, gaming edits, tech-themed videos, and comedy. Select your recording, browse for a robotic or electronic-sounding style, apply it, and preview it against the rest of your edit.
It tends to land better paired with something else visually — glitch effects, animated text, quick cuts. Our motion blur guide covers another technique that pairs nicely with fast, futuristic-feeling edits.
Recording First, Then Changing the Voice
Here’s the thing — clean audio gives you more control. Record your narration normally first, then apply the voice effect later instead of trying to perform with a processed voice in real time. Our voiceover guide walks through recording and editing narration specifically.
Once you’ve got a voiceover you’re happy with, select it and apply whatever effect fits. This order gives you more control — you get to actually hear the raw take before deciding how to process it, and if something’s off with the original, you can fix or re-record it before the effect ever touches it.
Getting Better Audio Quality Out of This
That’s the frustrating part — many people blame the effect when the recording is the real issue. A bad audio file usually stays bad. Record carefully, avoid noise, keep your mic distance consistent, and speak clearly before adding any effects.
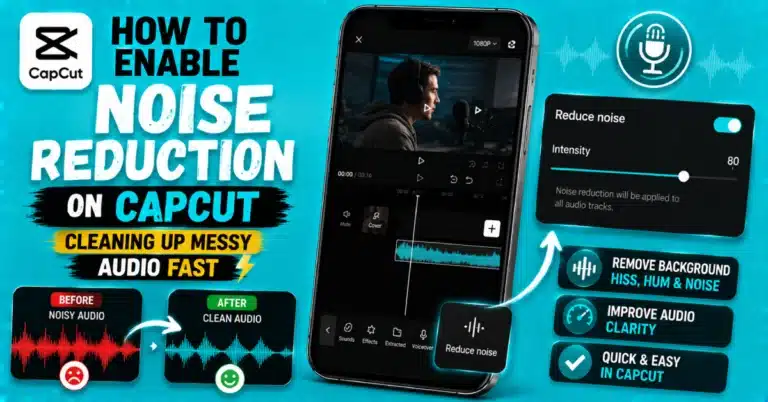
After applying an effect, check the volume — bump it up carefully if it’s too quiet, and pull back if it starts distorting. Noise reduction or other audio enhancement tools can help too, when your version offers them. Bottom line: clean source audio just produces better results once it’s processed, every time.
Can You Change Just Part of the Recording?
Here’s the thing — you don’t need to apply an effect to the entire track. Cut the audio around the section you want to edit, choose that part only, and add the effect there. Keep your normal voice for narration and switch effects when a character starts speaking.
Multiple Effects in One Video?
Also yes. Different sections of audio can carry entirely different effects — one character robotic, another deeper, whatever fits the story. The thing to watch for is consistency: if voices shift around without any real logic behind it, viewers lose track of what’s going on. Use distinct voices deliberately, as a way to help people track characters or follow a shift in the story — not just because you can.
When the Voice Changer Isn’t Working?
A few usual suspects here. First, confirm you’ve actually got the right audio or video clip selected — easy to overlook. Then check whether your specific CapCut version even supports the feature you’re looking for; availability shifts by device, account, region, and version. Restarting the app and reopening the project is worth trying too. If one particular effect is missing, it may simply not exist in your current build.
Mistakes Worth Avoiding
Overprocessing is probably the biggest one — push an effect too far and the voice becomes genuinely hard to understand, which defeats the point. Beyond that: recording in a noisy space to begin with, letting music drown out the voice, slapping effects onto every single sentence instead of being selective, not checking volume levels, picking an effect that just doesn’t fit the video’s tone, and exporting without giving the final audio a proper listen.
Always do a full playback before you publish anything — problems that seem minor in isolation can be a lot more obvious once you hear the whole thing together.
Is Any of This Free?
Depends on your version and the specific effect in question. Some voice tools are available without paying for anything extra, while certain effects or creative assets might sit behind premium access. Honestly, the fastest way to know is just opening your current CapCut build and checking what’s actually listed under voice effects — that’s more reliable than any general answer. Same goes for APK builds; what’s available there shifts by version too.
Wrapping Up
CapCut’s voice changer is a simple way to turn an ordinary recording into something more suited to gaming content, comedy clips, character work, Shorts, Reels, or whatever else you’re building. Record or import, pick an effect, preview it, adjust, export — that’s really the whole loop.
Here’s the thing — the best effect isn’t always the loudest or most unusual one. Begin with good audio, choose something that fits your video, and keep the changes natural. Check that background music doesn’t overpower the voice, then listen through the entire project before going live. It works across Android, iPhone, PC, and Mac without extra audio tools.
Frequently Asked Questions
What is the CapCut Voice Changer?
The tool gives recorded speech a new sound by applying different voice styles. Available options may include robotic, deep, funny, high-pitched, or character-like voices depending on your version.
How do I actually use it?
Why rush the effect? Import your footage first and select the voice clip. Open the audio tools, choose an available effect, and preview the result. If you like it, apply the effect.
Does it work on Android?
Yes, on supported versions — select your clip, open audio options, browse the available effects, and preview before finalizing your edit.
Does it work on PC?
Yes, when your desktop version includes it — import your footage, select the clip, open audio controls, choose an effect, and review before exporting.
Can I change just part of my voice?
Here’s the thing — you don’t have to change the entire audio track. Cut the audio around the part you want altered, add the effect to that section, and keep the remaining audio as it is or choose another effect.
Why isn’t it working for me?
That’s the frustrating part — not every user gets the same options. Before troubleshooting, check your selected clip and confirm feature availability. Device, account, region, and build differences can affect the result.
Does it hurt audio quality?
It can, especially with heavy processing — speech can start sounding less natural. Start with clean recordings, don’t overdo the effect, and always check the final audio before publishing.
Worth digging into a few more CapCut guides if you’re building out a fuller edit — pairing voice effects with the right visuals and music tends to be where things really come together.