Top 10 CapCut Editing Tips for Beginners to Edit Like a Pro in 2026
Introduction
Top 10 CapCut Editing Tips for Beginners can quickly improve your video results. If you feel confused by editing buttons as a new user, stay calm. Many people feel the same in the beginning. CapCut is easy, but small smart tricks are still important.
Editing becomes easier when you know the correct steps. Your videos will look clean and smooth. In this guide, I’ll share tips that are easy to understand. They don’t require experience. Even first-time editors can use them today. Let’s start.
Why CapCut Is Perfect for Beginners?
CapCut is easy. That is the biggest reason beginners love it. The layout is clean. You can drag, drop, cut, and add music in seconds. You don’t need any heavy editing knowledge. Just explore and try.
One more advantage is that it fits many devices. You can install CapCut For Android for mobile use. CapCut For iOS is made for iPhone users. If you like using a computer for editing, CapCut For PC and CapCut For Mac are good choices. You can then edit anytime without stress.
Tip 1: Start With the Right Aspect Ratio
Stop before adding clips and look at your aspect ratio. This one setting can save your video. Choose 9:16 when making TikTok or Reels. Pick 16:9 for YouTube content. Instagram posts work well with 1:1.
When the size is correct at the start, your video looks more natural. No black borders. No cropping problems. Trust me, the wrong ratio makes your video look unprofessional. Always decide your platform first, then start editing.
Why Does Aspect Ratio Affect Engagement?
Every platform shows videos differently. A well-sized video keeps viewers hooked. If it looks weird, they swipe away quickly. Small details, big differences.
Tip 2: Trim and Split Like a Pro
The split tool is your best friend. Many beginners keep extra clips in their videos. That makes the video slow and boring. Instead, cut useless parts. Remove silence. Remove mistakes. Keep it clean.
Use the split button to break long clips into small parts. Then delete unwanted sections. This makes your video fast and interesting. Short videos perform better, especially on social media.
Small Example for Better Flow
Picture recording a 2-minute clip, yet just 1 minute is important. After trimming, your content feels direct and strong. That is the power of smart cutting.
Tip 3: Use Smooth Transitions
Transitions connect two clips. CapCut gives many options like fade, slide, zoom, and more. But well, don’t use too many. Simple transitions look more professional.
Choose smooth effects like fade in or dissolve. Avoid flashy transitions for serious videos. Keep style matching your content theme. For vlogs and daily videos, simple works best.
When to Use Simple Transitions?
For YouTube vlogs or Instagram reels, clean transitions make your content look natural. Too much effect can distract viewers.
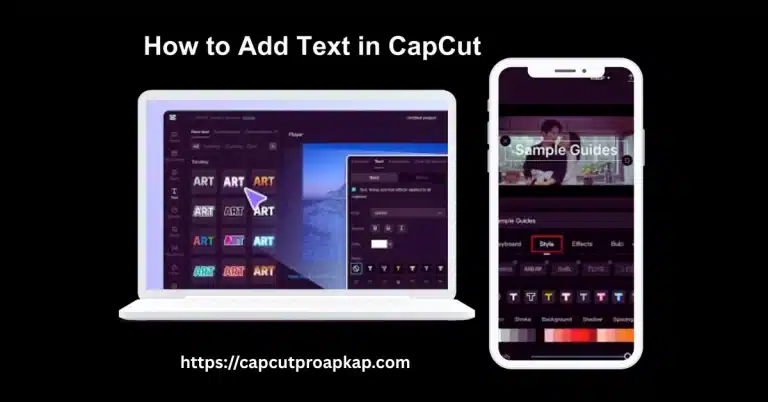
Tip 4: Add Text and Captions Properly
Text is powerful. It helps viewers understand your message even without sound. Add short captions for key points. Choose clear fonts. Don’t choose fonts that make reading hard.
Place text where it does not block faces. Use simple colors like white or yellow with shadow. Keep timing correct so text matches speech.
Why Captions Increase Watch Time?
Many people watch videos without sound. Captions help them stay. That means better watch time and engagement. Small effort, big result.
Tip 5: Use Background Music Smartly
Music changes mood. Happy music for fun videos. Calm music for travel videos. But adjust the volume. The voice should be clear. Music should stay in the background.
Lower music volume to 20% to 30% when someone is speaking. You can also fade music in and out. It sounds smooth and professional.
Tip 6: Apply Filters and Effects Carefully
Filters are fun. But too many filters can destroy a natural look. Start with small brightness and contrast adjustments. Slight color correction is enough.
Many beginners add heavy effects. That makes skin look strange and colors look fake. Keep it simple. Clean editing always looks premium.
Beginner Mistake to Avoid
Avoid over-editing. Simple editing wins in most cases. Viewers prefer natural content.
Tip 7: Master Keyframe Animation
The keyframe is powerful but simple to use. It allows you to create smooth zoom and movement. For example, zoom in slowly on a product or face.
Add one keyframe at start and another at end. Adjust position or scale. CapCut will create smooth motion automatically. It looks professional but takes only seconds.
Tip 8: Use Overlay Feature Creatively
Want to add another element to your video? The overlay is perfect. You can put a second video or an image over your main clip in seconds. This is great for reaction videos or tutorials.
You can show before and after clips together. You can add small reaction windows. This makes your video more dynamic and interesting.
Tip 9: Export Settings Matter
Many beginners ignore export settings. After editing perfectly, they export in low quality. That is sad. Always export in 1080p resolution. Choose 30fps for normal videos.
Higher resolution keeps your video sharp. Good export settings protect your hard work.
Best Settings for Social Media
For most platforms, 1080p and 30fps work well. File size stays reasonable and quality remains clear.
Tip 10: Practice With Templates
If you are in a hurry, use templates. CapCut Pro offers many ready-made designs. Just add your clips and music. Done. Templates are great for beginners. You learn structure and timing by observing them. Later, you can customize and create your own style.
CapCut Versions You Should Know
Some users want more advanced features. That is why many people search for CapCut Pro. It offers premium tools and removes watermark.
Others look for CapCut APK Download options to install manually. Some prefer CapCut Pro APK for unlocked features. There is also CapCut Mod APK which claims to provide premium access. You may also see CapCut Pro APK Download searches online. Be careful. Always download from trusted sources.
Some people stick to the old CapCut version because their phone can’t take the new one. Works totally fine—just pick the version that fits your device.
Common Beginner Mistakes to Avoid
Don’t overuse effects. Don’t ignore audio quality. And never export in low resolution. These three mistakes can reduce your video quality instantly.
Keep learning. Practice daily. Watch other creators. Try small experiments. Slowly, your editing skill improves.
Conclusion
Top 10 CapCut Editing Tips for Beginners are simple but powerful. Don’t worry about costly software—amazing videos are possible with just the basics and some daily practice. Editing is like cooking. The first few times may feel messy. But with time, you get better. Apply these tips one by one. Improve step by step.
These Top 10 CapCut Editing Tips for Beginners really work—your videos will look a lot cleaner and more professional if you follow them. Now open CapCut and start editing today.
FAQs
Is CapCut APK good for beginners?
No, modified CapCut APK versions can increase the risk of getting malware, spyware or having your data stolen. For security get the official CapCut app from a store you trust.
Can I use CapCut without watermark?
CapCut is reliable, on Android and iPhone. You can edit videos.. If you work on long or detailed projects the PC version is better. You get space and accurate control.
What is the best export setting?
1080P at 30fps is recommended for most social media uploads because it provides video quality and efficient file sizes. If you create gaming or high action content 60fps offers playback.
Is CapCut Pro worth it?
The answer of Is CapCut Pro Worth it? is yes! it is useful. The controls are simple. The layout is clean. The editing features are also intuitive which means you can learn how to use them
Can I edit videos on PC?
Yes, CapCut is available for both Windows and Mac computers. I really like that the desktop version has a lot of space to work on my video projects. It also has precise controls for the timeline and I can use keyboard shortcuts to make things easier. There are also editing tools that help me with longer or more detailed videos.
How long does it take to learn CapCut?
Most beginners think CapCut is easy to learn. If you practice with CapCut every day, for a week you will understand the editing tools and as you keep using it you will feel more comfortable using the harder features and special effects and transitions and AI tools that CapCut has.
Now it is your turn. Start editing and grow your creativity today.