CapCut 60 FPS: Exporting Smoother Video in 2026
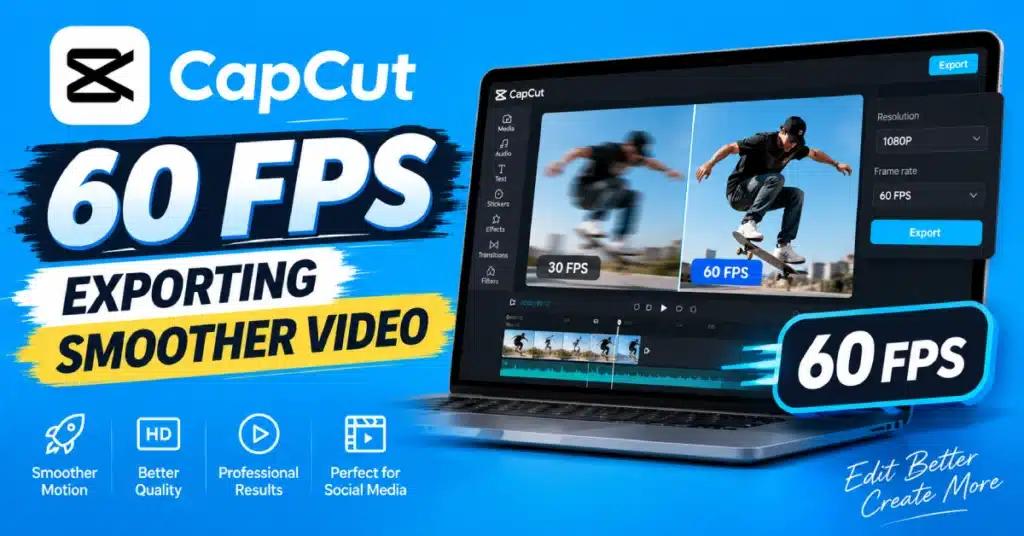
Ever notice how some gaming clips or sports highlights just look… smoother? Not edited better, necessarily — just physically smoother, like the motion itself has more information in it. 60 FPS is usually responsible for this appearance. Since it records as many frames as 30 FPS it gives the editor more details to work with and prevents quick motion from looking uneven.
The part many users overlook is that selecting “60 FPS” during CapCut export cannot turn 30 FPS footage into real 60 FPS video. The original recording still decides how much motion detail is available.It’s not a quality slider. What you actually get out the other end depends on what you recorded, how your project’s set up, what device you’re exporting from — the export setting is really just the last step, not a fix-all.
CapCut APK users might have a couple of extra export options floating around depending on version, but that doesn’t change any of this.
Okay, But What Does FPS Even Mean
Frames per second. Literally how many still images flash by to make up one second of video.
| Frame Rate | Typical Use |
| 24 FPS | Cinematic footage |
| 25 FPS | Some broadcast content |
| 30 FPS | General-purpose video |
| 60 FPS | Smooth action and gaming |
| 120 FPS | High-frame-rate slow motion |
Double the frame rate, double the frames packed into that same second. More frames, smoother-looking motion — especially once the camera or subject starts moving fast.
Why People Actually Bother With This?
Smoother motion. That’s really the whole pitch. Gameplay footage feels less stuttery. Sports clips hold up better during a fast play. Panning shots stop looking jerky. And if the source was shot at a higher frame rate to begin with, slow motion ends up looking a lot better too.
Where it tends to matter most: gaming, sports, action footage, dance content, car videos, quick-cut transitions, slow-mo shots, anything with a lot of energy going into it.
Where it doesn’t matter much: a talking-head video, a tutorial, anything mostly static. 30 FPS is fine there — bumping it up won’t do anything noticeable.
How to Actually Export at CapCUt 60 FPS?
Finish editing first, obviously. Then head into your export settings and look for Frame Rate. If 60 shows up on the list, tap it, then set your resolution and whatever else is offered.
One thing worth checking before you commit — does your source footage actually support 60 FPS? Exporting doesn’t manufacture frames that were never captured. Once that’s confirmed, hit export and let it render.
Menus move around a bit between CapCut versions, so if yours doesn’t match a screenshot you saw somewhere, that’s normal, not broken.
Android
Open the finished project, tap export, find the frame rate setting, pick 60 FPS. Choose a resolution, glance over everything else, and go. There’s more in our CapCut for Android guide if you want the fuller picture. Not seeing 60 as an option? Check your footage’s original frame rate first, then your CapCut version — this varies more by device than people expect.
iPhone
Basically identical process. Open the project, tap export, dig into the frame rate menu, select 60 FPS if it’s there, pick your resolution, export. Our CapCut iOS guide covers more on iPhone/iPad specifics. And honestly — if you already know 60 FPS is the goal, just record at 60 FPS from the start. Trying to manufacture it in post isn’t really a thing.
PC
Finish the edit, click export, see what frame rate and resolution combos show up. Select 60 if it’s supported, pick a resolution, start rendering. More desktop-specific tools live in our CapCut on PC guide. Worth mentioning: a stronger machine really does help once you’re stacking effects and overlays on a high-res timeline. That combo gets heavy fast.
Mac
Same idea. Finish the project, open export settings, find frame rate, pick 60 if available, choose your resolution, export. Our CapCut Mac guide has more macOS-specific notes. And if the timeline chugs while you’re editing — that’s a preview issue, not necessarily what your final export will actually look like. Don’t panic over laggy scrubbing.
Does Higher FPS = Better Quality?
Not really, no — and this trips a lot of people up. Frame rate and resolution aren’t the same knob. One’s about how many frames show up per second; the other’s about how many pixels are packed into each frame.
You could shoot 1080p at 30, or 1080p at 60. Same resolution either way — just a different number of frames stacked into that same second. Higher FPS smooths motion. It does nothing for sharpness. If your footage already looks soft or noisy, that’s a separate fix — our guide on improving video quality in CapCut is the better read for that particular problem.
Can You Just Export 30 FPS Footage as 60?
Sure, if the toggle’s there. But flipping that switch doesn’t invent motion data your camera never captured. You end up with a 60 FPS file, technically — it just won’t move like footage that was genuinely shot at 60 from the start.
If smooth motion actually matters to the project, the fix happens at the camera, not in the export menu.
Slowing 60 FPS Footage Down
This is arguably the best reason to shoot at 60 in the first place. More frames captured means more material to spread across a slow-motion stretch, and the result holds together noticeably better than trying to slow down standard 30 FPS footage. Sports, gaming, dance, action, nature shots, anything cinematic — this is where it earns its keep.
Slow Motion, Specifically
Slowing something down just means each frame sticks around longer on screen. With more frames available at 60 FPS, that stretch has more to work with, so it reads as smoother rather than stuttery. Some creators push even further — 120 FPS or higher, camera permitting — though that eats storage and processing power fast.
Gaming Content: Worth It?
Generally, yes. Games are full of rapid camera swings and quick action, exactly the situation where extra frames pay off. Camera motion smooths out, fast plays stay legible instead of blurring together, gameplay just reads as more fluid overall.
If the original capture was 60 FPS, keeping the export at 60 preserves that — dropping down loses information you already had. Just know your machine needs to actually handle that workload; it’s more demanding than a standard edit.
TikTok and Reels?
For anything with real movement — dance, sports, car content, gaming, snappy transitions — yeah, it helps. Worth knowing though: the platform’s going to compress and reprocess whatever you upload regardless, so exporting at a crisp 60 FPS doesn’t guarantee that’s exactly what viewers end up seeing. Still, feeding the platform a stronger source file tends to come out better on the other end than starting weak.
Bigger Files?
Usually. More frames stored per second means more data, full stop — so 60 FPS files typically run larger than 30 FPS ones at comparable settings, though resolution, bitrate, and compression all factor in too.
That ripples outward: longer uploads, more storage eaten up, heavier processing, occasionally rougher editing performance while you work. On longer projects it adds up in a way you’ll actually notice. Reach for 60 FPS because the content calls for it — not as a default setting you never think about.
Do You Need a Beefy Device?
Somewhat — higher frame rates do add processing overhead, but how much depends on resolution, effect count, source footage, your hardware, and how long the project runs. A quick, simple export might run fine on a mid-range phone without issue. A long 4K timeline buried in effects is an entirely different animal and will genuinely strain weaker hardware. If things start lagging, drop your preview quality or close other apps while editing.
Actually Getting Smooth Results
Start at the source — shoot at 60 FPS if that’s your target, rather than hoping post-production fixes it. Skip unnecessary frame-rate conversions mid-edit, and keep your project settings matched to whatever you actually recorded.
Shutter speed matters more than people think, too — frame rate alone won’t guarantee smooth-looking motion if your shutter’s working against you. While editing, don’t pile on so many effects that playback starts choking. And before you upload anything, actually watch the final export through once.
What Resolution Goes With 60 FPS?
Match it to your source and wherever it’s headed. 720p, 1080p, 2K, 4K — pick based on those two things.
1080p at 60 tends to be the sweet spot for most creators: decent quality, manageable file size, doesn’t demand a ton from your machine. If you shot in 4K and both your device and platform can handle it, going bigger makes sense. Just don’t upscale weak footage to make the file feel more premium — it won’t add detail that isn’t there.
Keeping Things Looking Clean
Frame rate alone won’t save a blurry shot. Solid source footage, decent lighting, minimal digital zoom, the right resolution, sensible compression, a final check of your export settings — none of that’s frame-rate related, but all of it matters just as much.
If you’re throwing fast-moving text or graphics into the mix, our text animation guide can help those feel smoother instead of jittery against the footage behind them.
Transitions at 60 FPS
They tend to look sharper here, honestly — more frames means more motion data to draw from during the transition itself. Zoom transitions, flash effects, motion blur, slide transitions, speed ramps — all of it plays nicer at 60.
There’s a whole guide on flash transitions specifically if you want to go deeper there. Motion blur especially helps fast transitions feel connected rather than jumpy.
Mistakes Worth Avoiding
The classic one: shooting at 30 FPS, then acting surprised when a 60 FPS export doesn’t magically look smoother. It won’t — the motion data just isn’t there to begin with.
Right behind that: defaulting to 60 FPS on everything, even projects where smooth motion adds absolutely nothing. Beyond those two — starting from weak source footage, exporting bigger than the project actually needs, not paying attention to file size, stacking so many effects the timeline chokes, and skipping the final review before uploading. Match your settings to the project. Don’t just grab the biggest numbers because they’re there.
Do You Need CapCut Pro?
Not particularly. Whether 60 FPS shows up as an option has more to do with your version, device, and project than your subscription tier. Premium might unlock a few extra effects or templates, but frame-rate availability is something you check directly in the export menu — paying for Pro won’t necessarily add it if it’s not already there for your setup.
What About CapCut APK?
Supported builds generally do offer 60 FPS export, though what’s actually available shifts around between versions and devices. Missing option? Check your version and your footage’s original frame rate before assuming something’s broken. And genuinely — skip the sketchy modified APKs just to chase one setting. Not worth the risk to your device or project files for a single export option.
Where This Leaves You?
CapCut’s 60 FPS export is worth reaching for whenever the content actually benefits from it — gaming, sports, action, anything fast-moving. But keep the core lesson in mind: your source footage sets the ceiling. No export setting rewrites what your camera already captured.
Shoot at 60 when it matters, keep your project settings aligned with your source, pick a resolution that fits the actual need, and don’t let file sizes balloon for no reason. Give the final export an actual watch before it goes anywhere public.
Android, iPhone, PC, Mac — doesn’t matter which. Once you get how frame rate, resolution, and file size actually interact, you’ll pick better settings without having to guess every time.
Frequently Asked Questions
What does 60 FPS in CapCut actually mean?
Video can run at up to 60 frames per second of the usual 30 frames per second. This makes the video look really smooth. It is very noticeable when you are watching videos of games, sports videos and videos with fast camera movement.
How do I export at 60 FPS?
You need to finish editing your video. Then you can open the export settings. Find the frame rate option. Your video will look better if you choose 60 FPS if it is available. You should also select your resolution. Review all the settings for your video to make sure they are correct. Then you can export your video.
Will exporting 30 FPS footage at 60 make it smoother?
No, There’s no extra motion data being created — the footage plays back at 60 FPS technically, but it won’t move like real 60 FPS footage.
Is 60 FPS just always better than 30?No, it depends entirely on the content. Fast motion and slow-mo benefit; static or talking content usually doesn’t need it.
Do 60 FPS exports run bigger?
Typically yes — more frames stored means more data, though resolution, bitrate, and compression all play a role too.
Can I slow down 60 FPS clips in CapCut?
Yes, and it holds up noticeably better than slowing down 30 FPS footage — good for sports, gaming, dance, action.
Can I do 4K at 60 FPS?
Depends on your device, version, and project — check the export menu directly rather than assuming either way.
If the frame rate basics make sense now, there’s more worth digging into around quality settings, speed effects, and transitions — they all tend to feed into each other once you start layering techniques.